Home › Repair cases › Range Rover Sport
RIDE QUALITY · SUSPENSION · RIDE HEIGHT
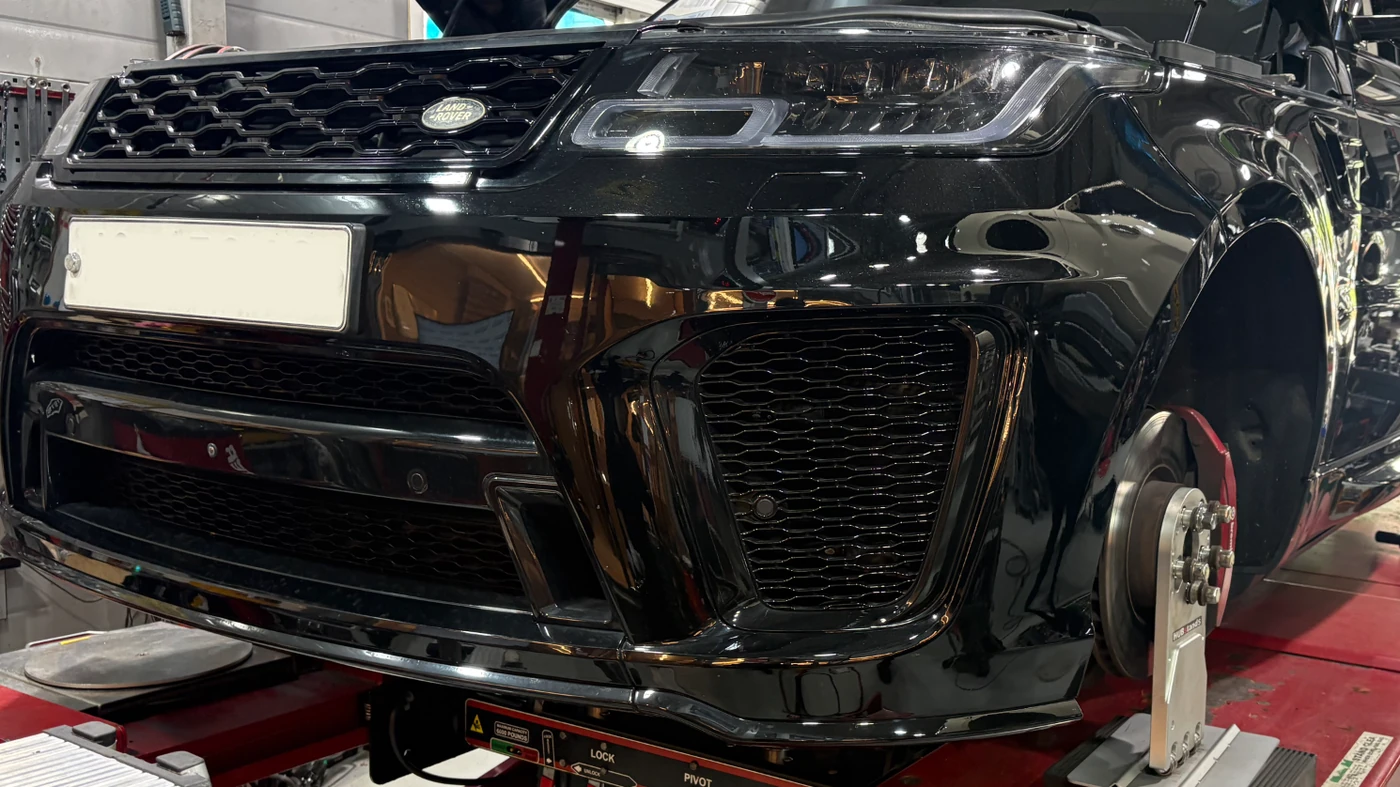
Range Rover SportRide harshness and steering vibration
Bushing tightening and ride-height calibration
The thumping from the rear
over speed bumps is gone
In our experience, the Range Rover Sport feels firmer than the Vogue while still offering a comfortable ride. We hear from owners who have replaced suspension parts and felt little benefit—or an even harsher ride. This 2016 Sport arrived with a request for ride-height bushing tightening.
On this page
- Lower tyre pressures had not resolved the harsh ride
- Ride comfort and bushing life start with the tightening position
- Bringing the heights closer, then checking the ride
- Toe adjusted; the remaining caster difference explained
- The steering-wheel vibration also called for tyre and wheel checks
- Road-test results and the technician’s assessment
- Plan suspension repairs through to tightening and the road test
- Scope and cost
- Questions about bushing tightening and ride height
- The owner’s next-day feedback
01
Lower tyre pressures had not resolved the harsh ride
The owner had reduced the tyre pressures in an attempt to improve comfort. On the initial road test, the steering wheel sat slightly left of centre and the vehicle drifted gently left. At higher speed, resonance and vibration reached the steering wheel.
Although the request was for ride-height bushing tightening, ride harshness and steering-wheel vibration needed separate attention. Before suspension work, we recorded ride height at all four corners and the initial alignment.
02
Ride comfort and bushing life
start with the tightening position
Rubber bushings deform as the suspension moves, helping absorb vibration and road impacts. For bonded rubber-to-metal bushings, the suspension position when the bolts are tightened matters.
WHY TIGHTENING POSITION MATTERS
The same bushing,
a different tightening position
Both views show the vehicle at its standing height.
Tightened with the wheel hanging
Rubber already twisted
Lowering the vehicle twists the rubber;
road movements add to that twist.
Tightened at standing height
Less unwanted initial twist
The standing position is the reference,
reducing unwanted initial twist.
Ride feel
Reduce unwanted resistance from a pre-twisted bushing
Component life
Reduce the risk of early wear from repeated movement with initial twist
If the relevant joint is tightened with the wheel hanging down, the rubber may already be twisted when the vehicle is lowered. Repeated road inputs then act on a bushing that is unnecessarily preloaded, which can restrict its intended movement and contribute to premature wear—even in a new part.
This is why the relevant joints are tightened at normal standing height.
It is part of looking after ride comfort and the service life of replacement suspension parts.
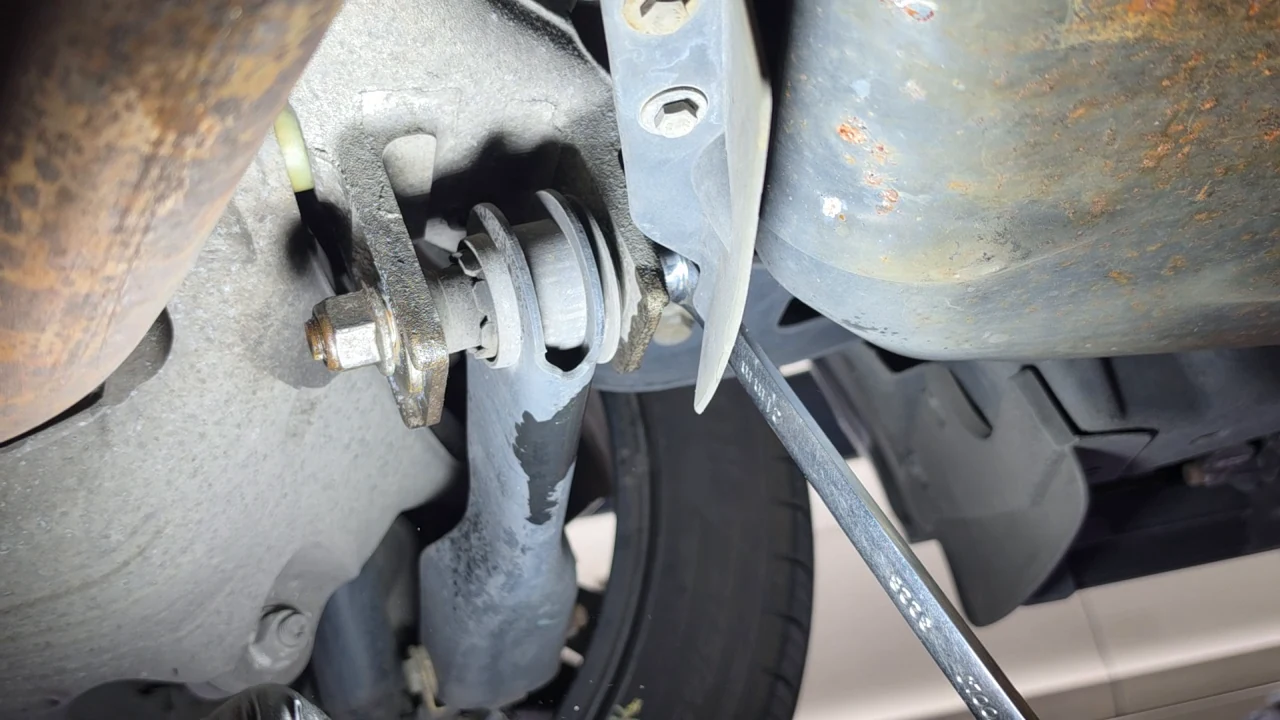
For this vehicle, the wheels were removed and dedicated hub supports used to position the suspension at its standing height for work on the relevant fasteners.
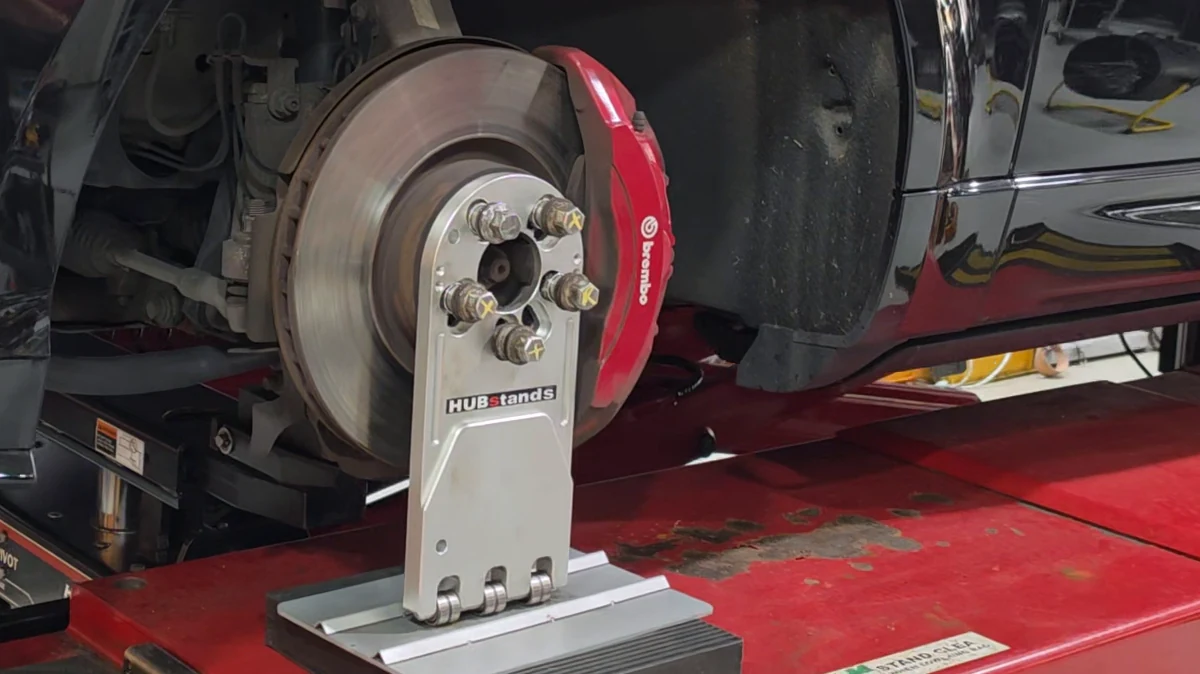
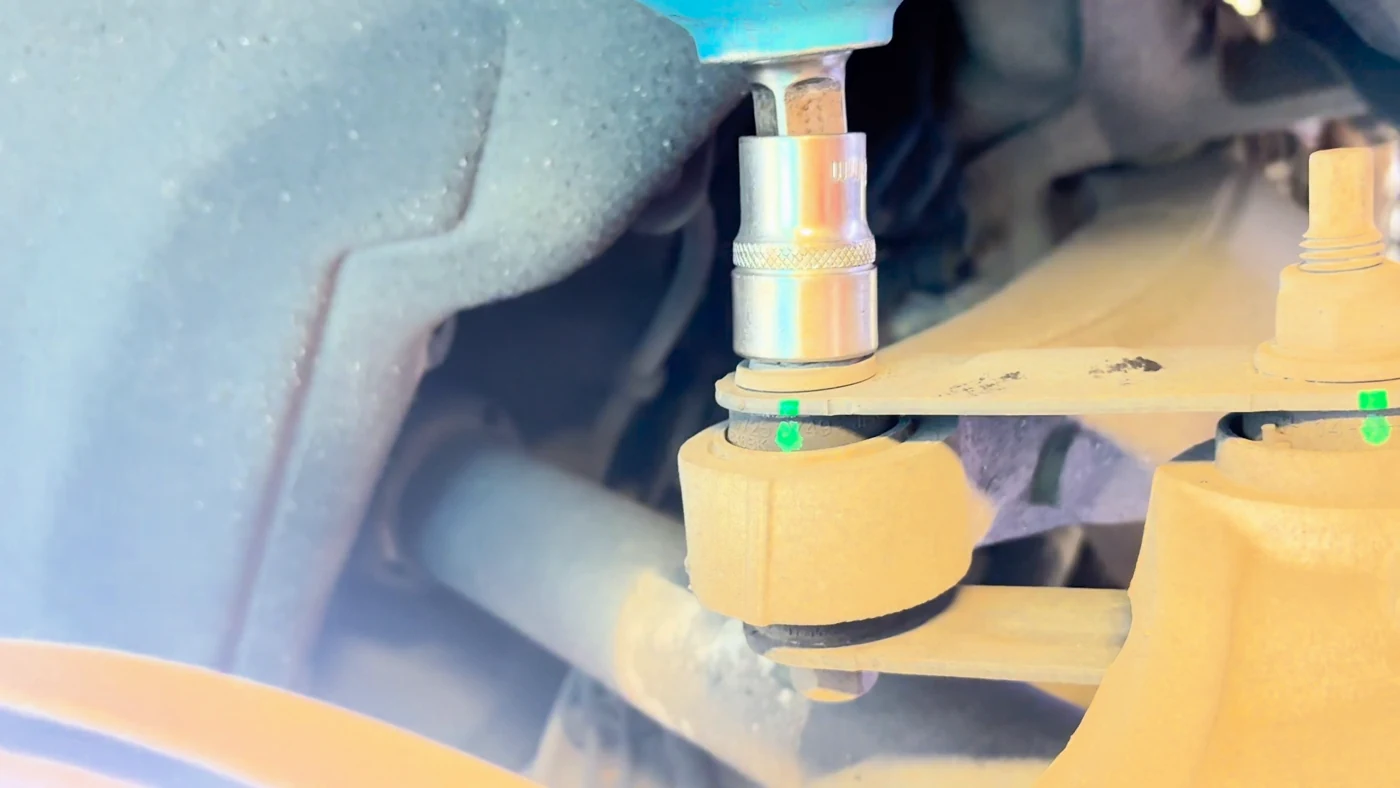
MOOG’s installation guidance explains the general connection between tightening position and premature wear. Applicable joints and tightening requirements follow the vehicle-specific service instructions.
Time-consuming work
that is not obvious from the outside
The suspension needs to be placed at its standing height, with enough access for the tools at each joint. This takes more preparation than tightening with the wheels hanging. The result is not obvious from the outside, so it is worth asking how the tightening will be completed when arranging suspension repairs.
This Range Rover took a full day for bushing tightening, height calibration, alignment, Road Force work and road testing together. We drove it during the work and again at the end to assess ride comfort and steering behaviour. In our workshop experience, Range Rovers tend to need more time for this work, which is taken into account when booking.
03
Bringing the heights closer, then checking the ride
Left–right height differences remained after bushing tightening. Following height calibration, the front readings matched and the rear readings were close. We then finalised the alignment and road-tested the vehicle.
RIDE HEIGHT · LEFT–RIGHT DIFFERENCE
How the left–right height gap
changed through the work
A shorter bar means the two sides of that axle are closer in height.
Front
Rear
THEN WE DROVE IT AGAIN
The ride felt more compliant than it had that morning
On the final road test, the suspension felt more compliant over the road and the earlier steering-wheel vibration was not reproduced. This was after bushing tightening, height calibration, alignment and Road Force balancing had all been completed.
View all 12 measurements and the three-stage changes
RIDE HEIGHT · THREE MEASUREMENTS
Measurements at all four corners
Ground → wheel arch · mm
Front
Left–right gap7→0mmRear
Left–right gap8→1mmThe detailed graph uses ground-to-wheel-arch measurements. These start from a different point than the hub-centre-to-wheel-arch values entered in the diagnostic tool.
04
Toe adjusted; the remaining caster difference explained
The initial front toe readings differed substantially from left to right. After height calibration, front and rear toe were adjusted. Steering-wheel centring and straight-line behaviour were then checked on the final road test.
TOE · BEFORE AND AFTER
Wheel direction,
balanced left and right
Before work
Front readings differ left to right
After adjustment
Equal left/right toe on each axle
View the actual before-and-after alignment screens
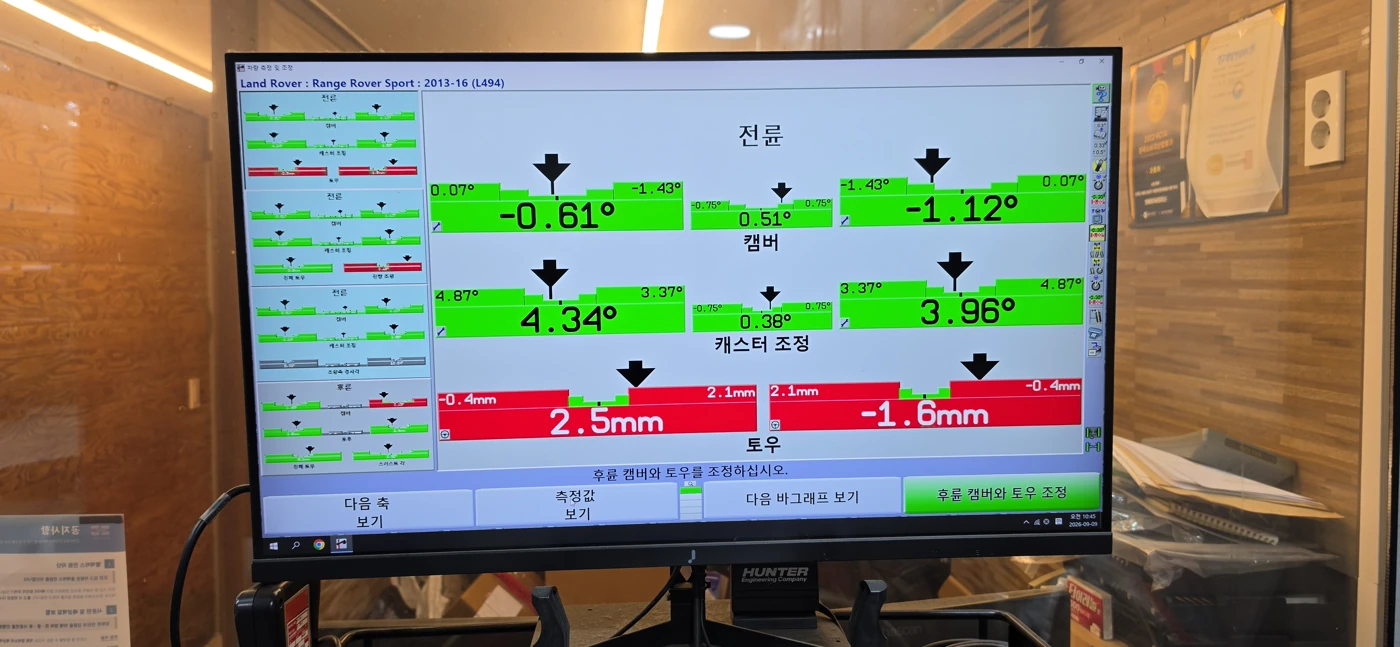
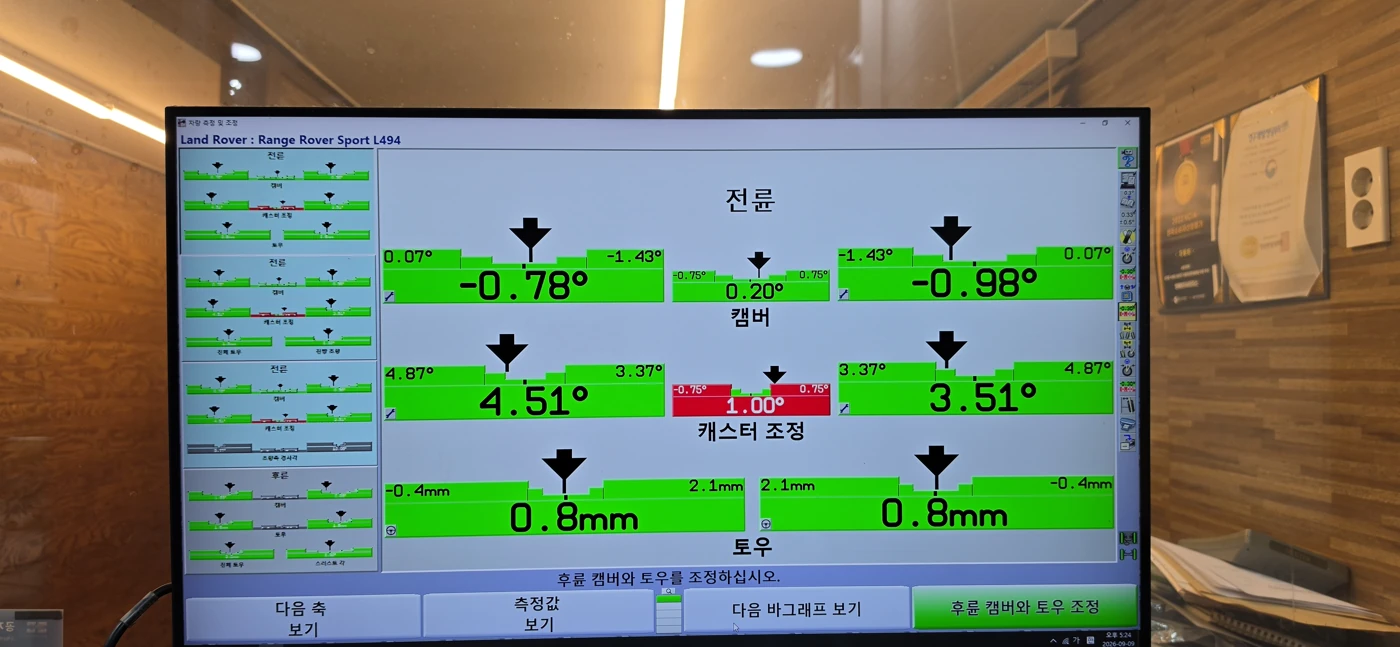
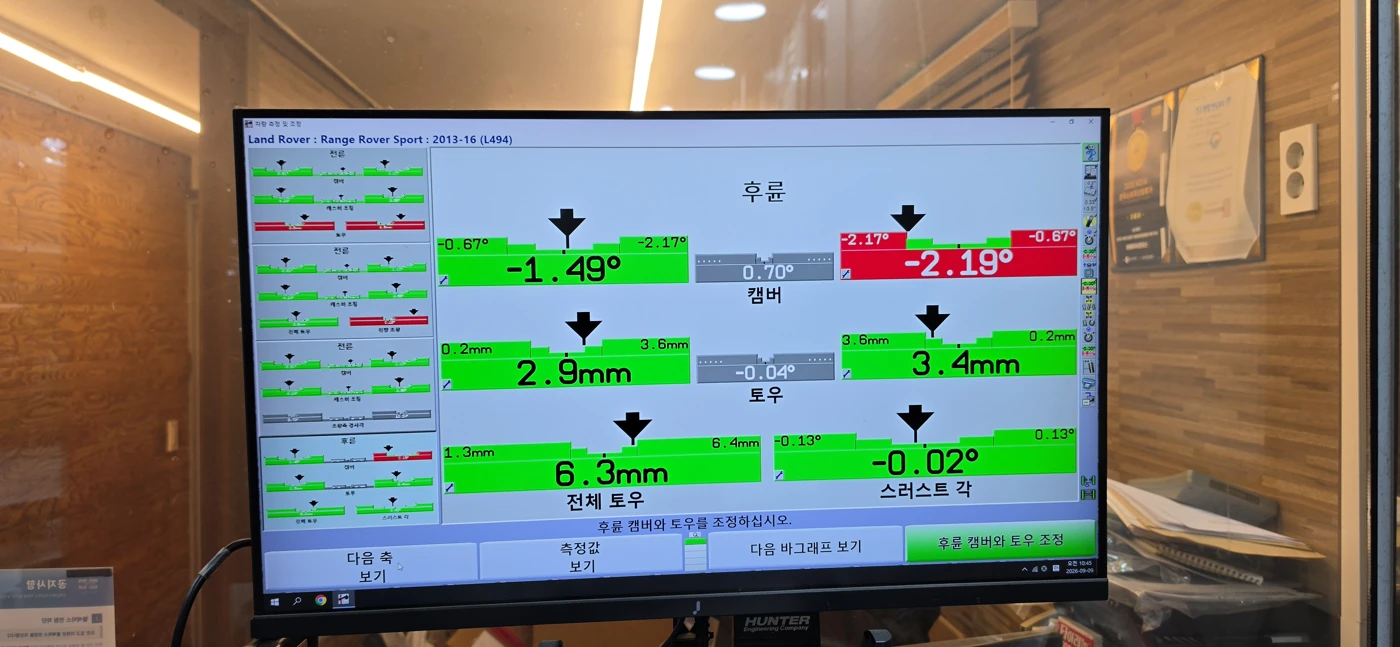
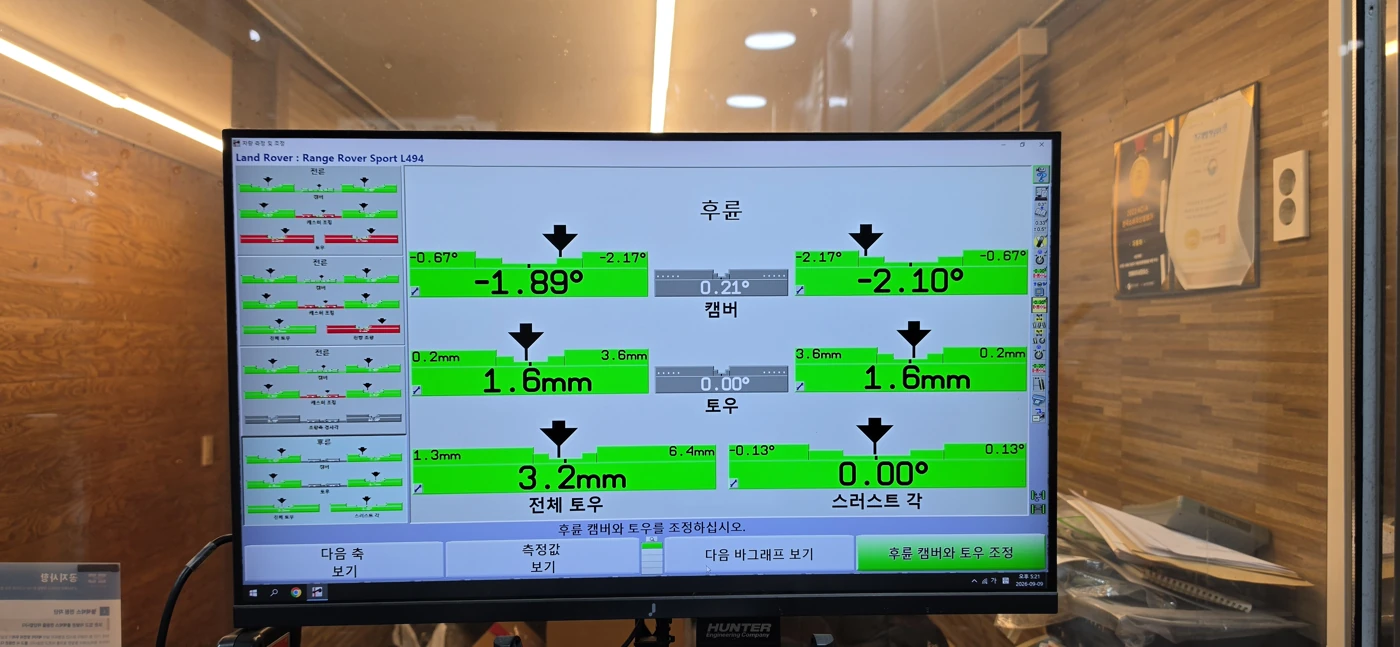
The final front caster readings were 4.51° on the left and 3.51° on the right, leaving a 1.00° cross-caster difference. Rear thrust angle changed from −0.02° to 0.00°.
On the final road test, the steering wheel was centred and the initial left drift was not reproduced. The remaining caster difference was explained to the customer, with straight-line behaviour to be monitored.
05
The steering-wheel vibration also called for tyre and wheel checks
Road Force balancing was also carried out. Conventional balancing checks mass imbalance as the assembly spins without a road-load roller; loaded measurement checks tyre radial force variation (RFV). More than one issue was present within the owner’s complaint about driving comfort.
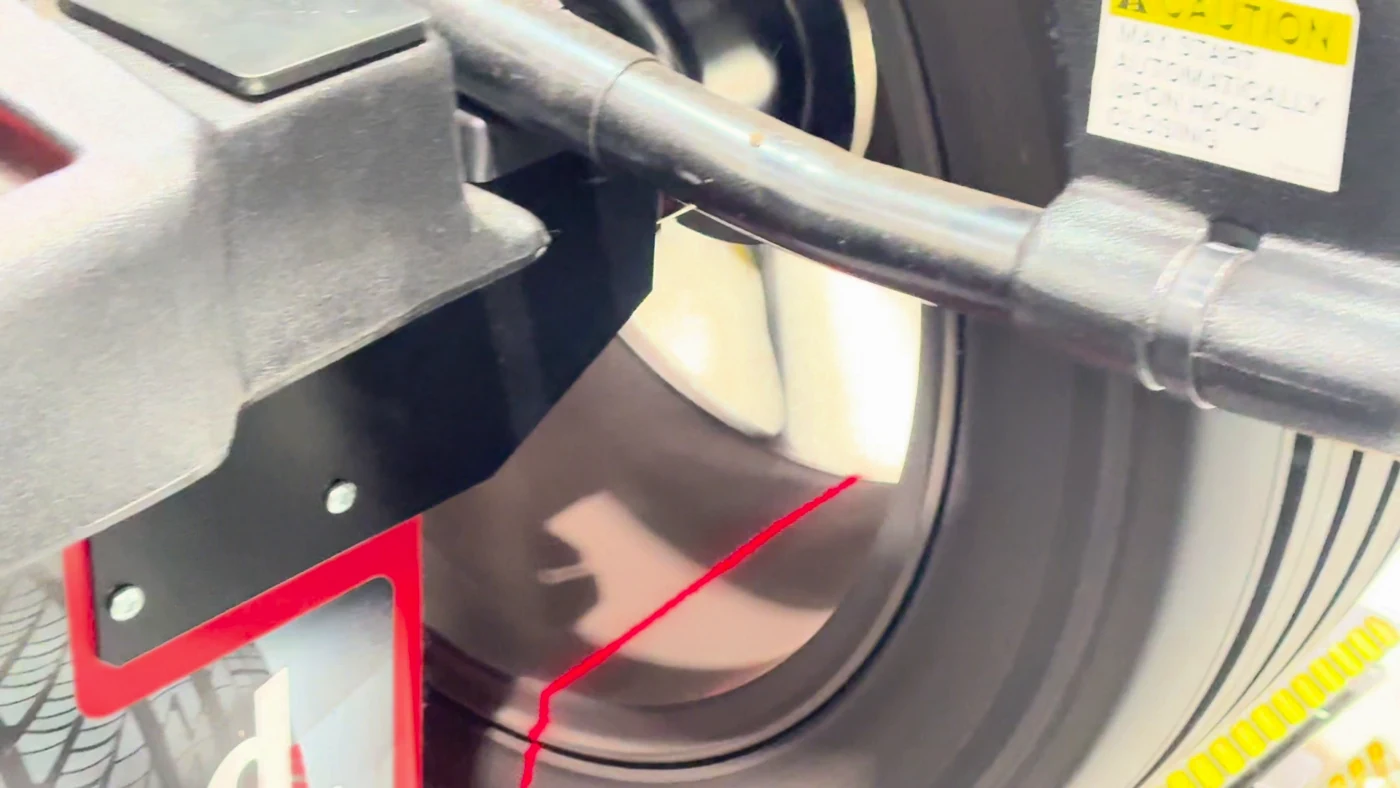
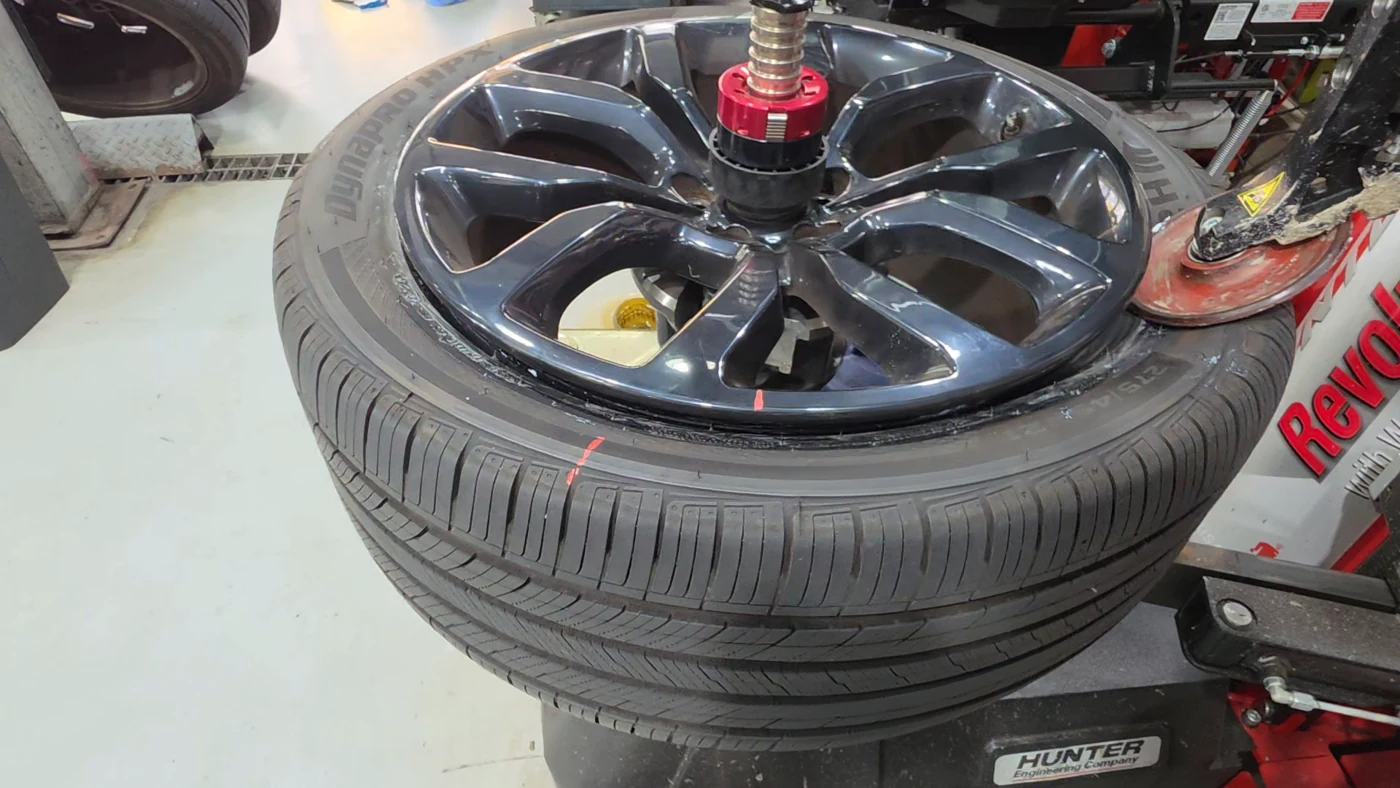
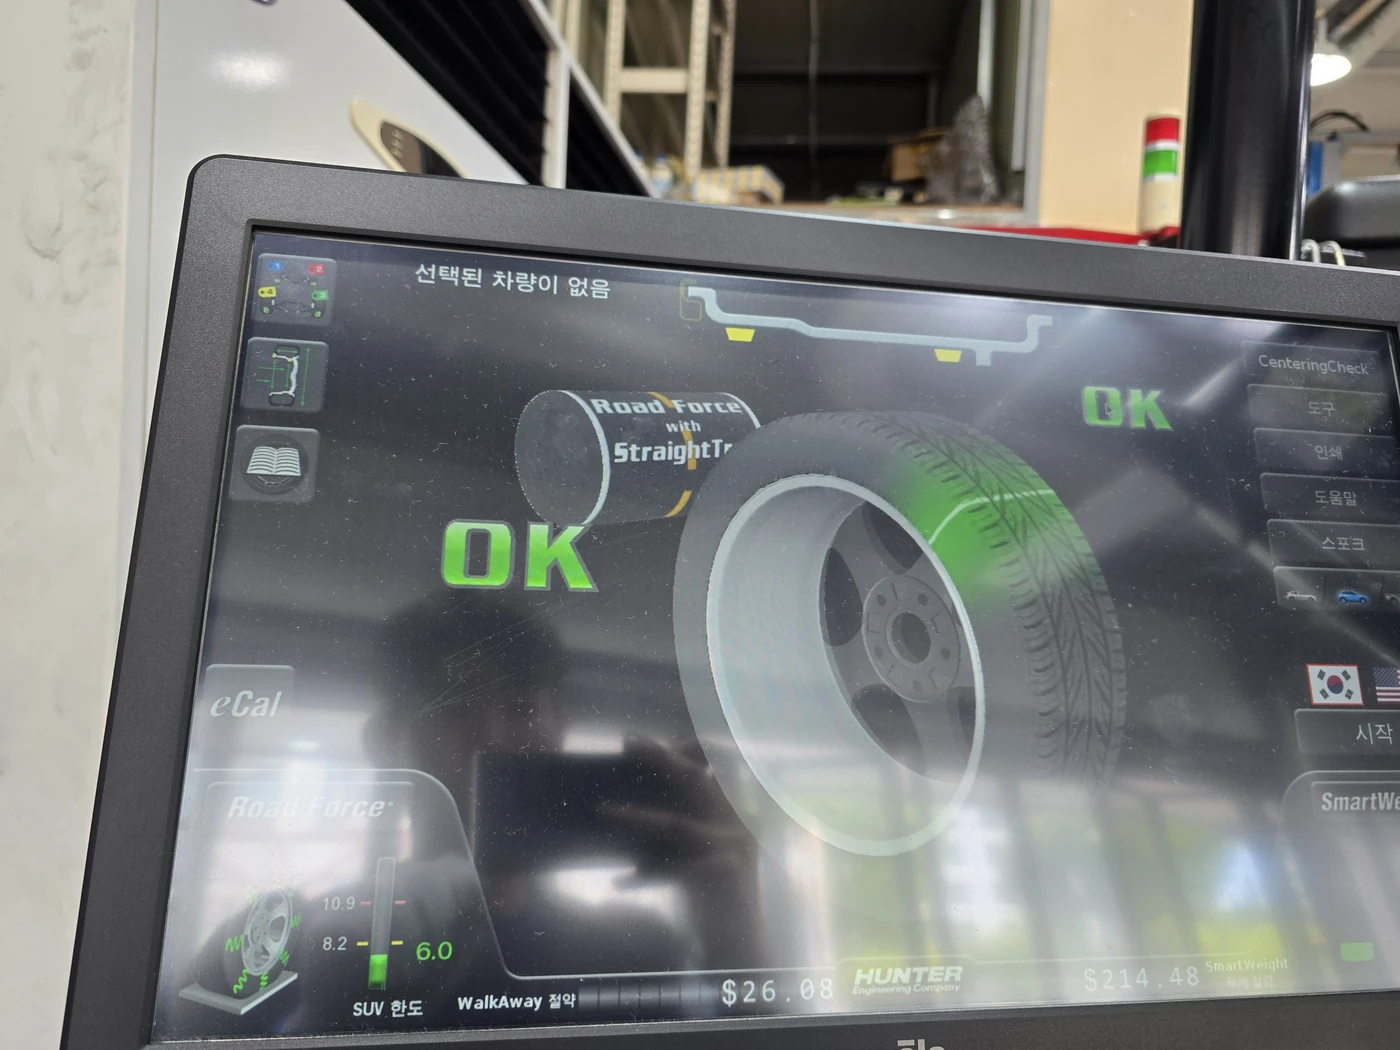
View four more measurement photographs from the work
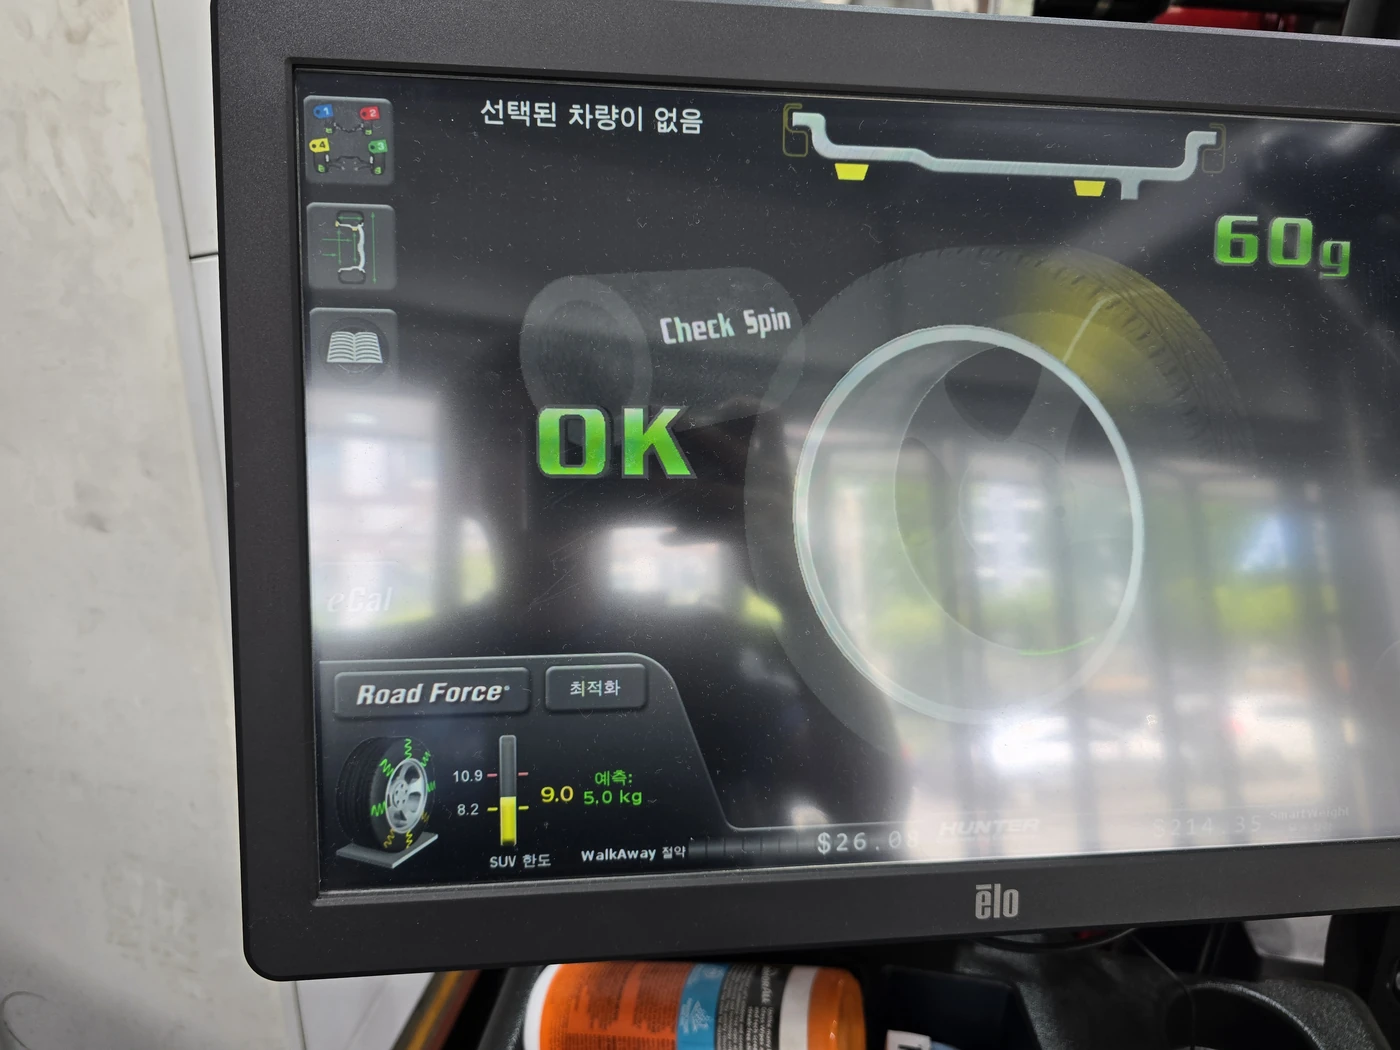
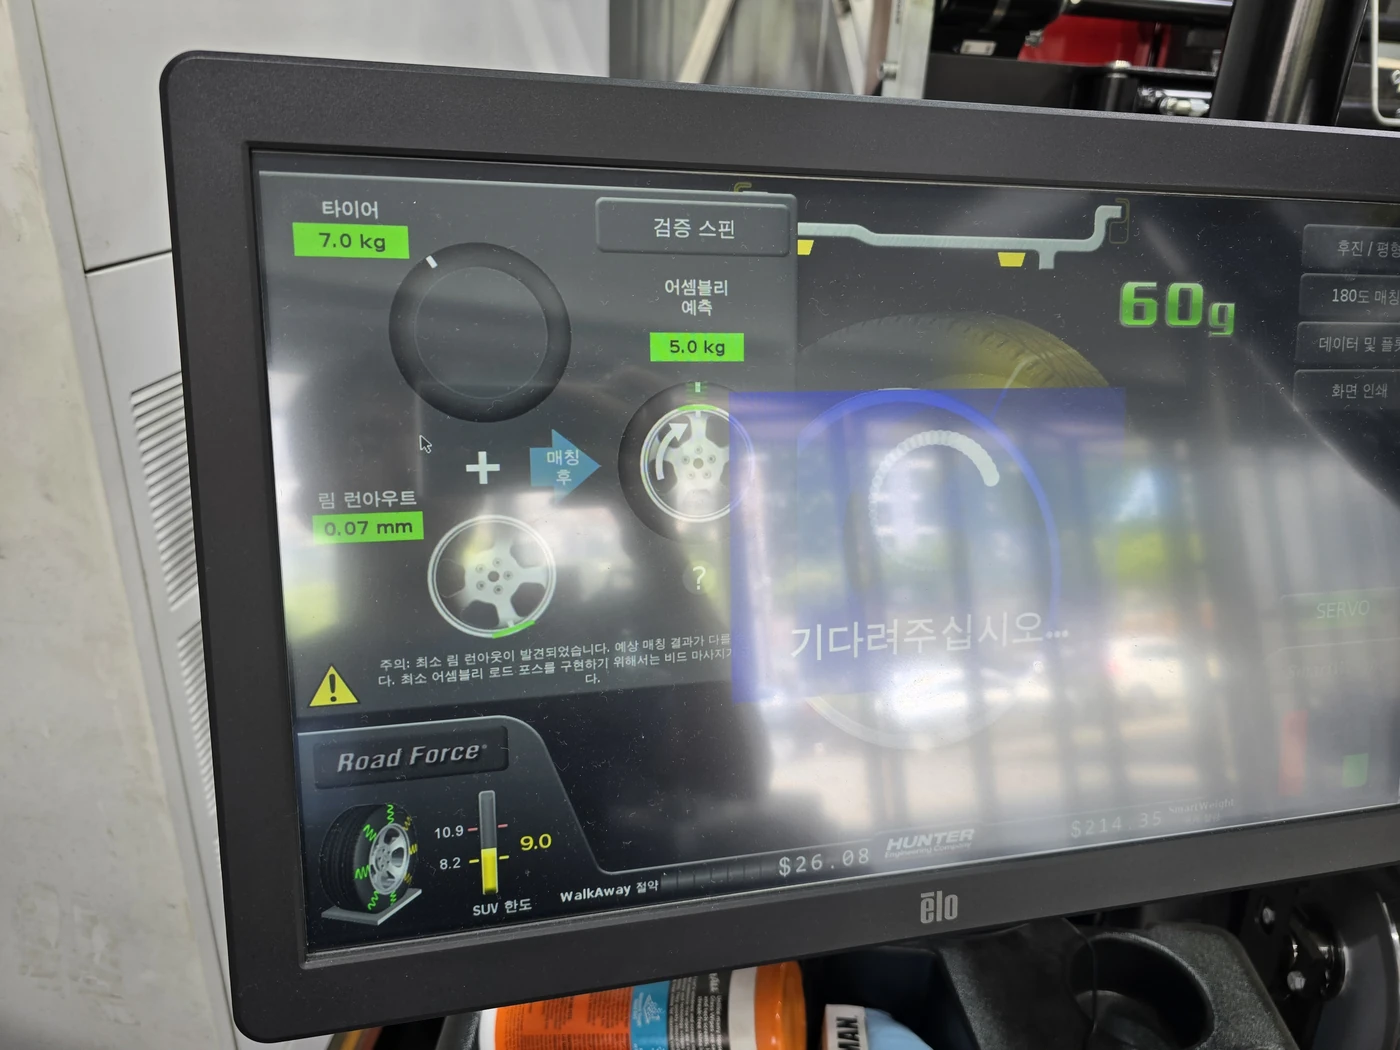
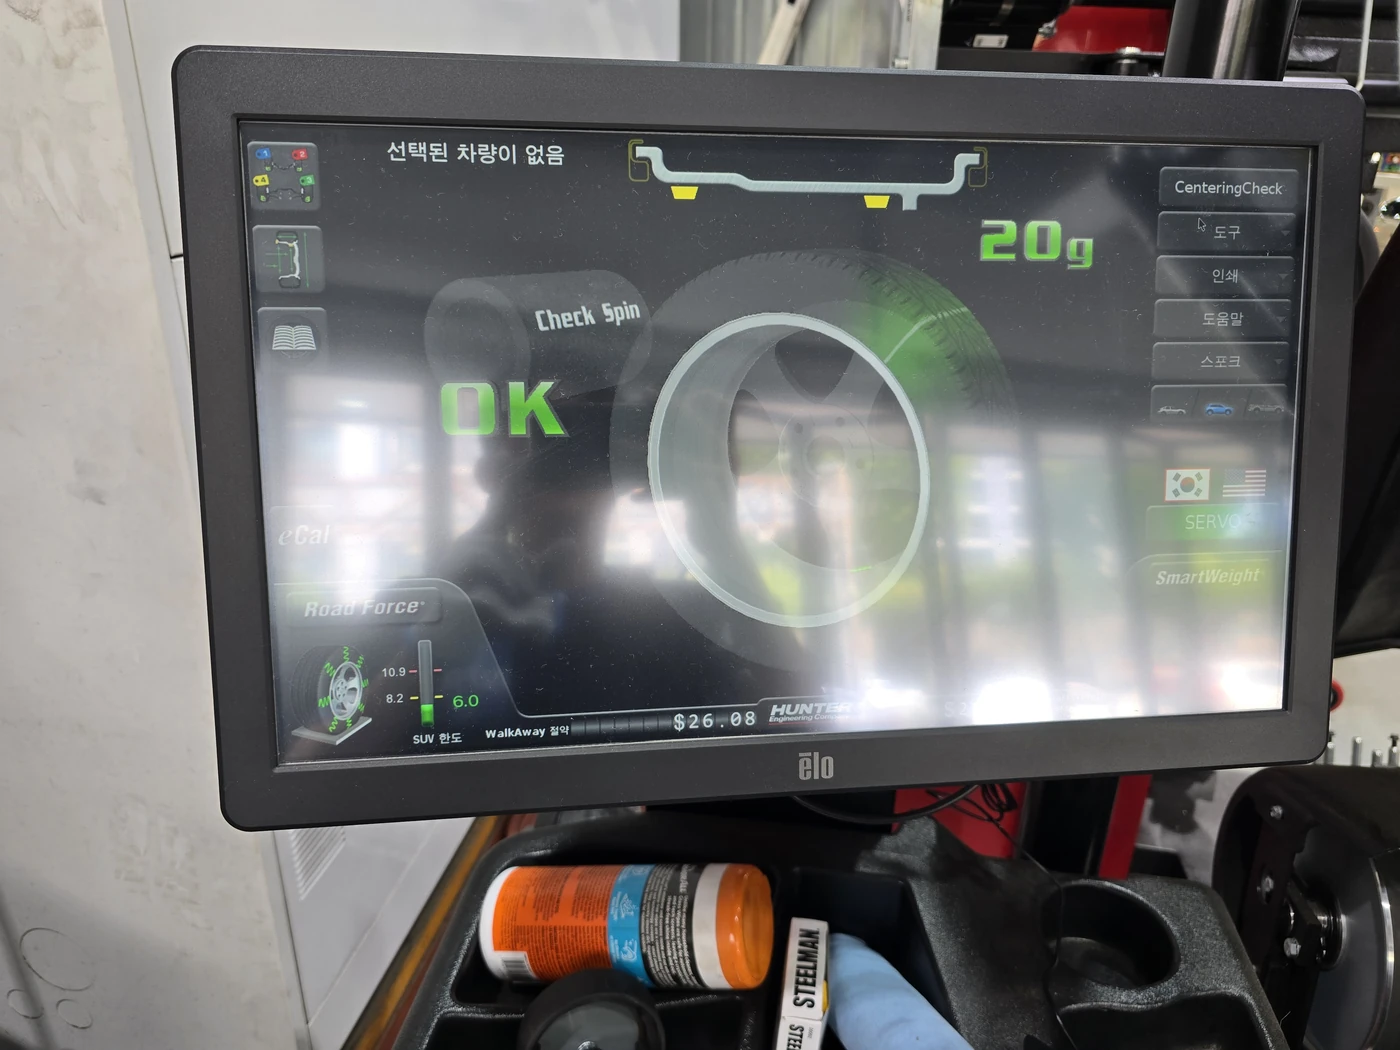
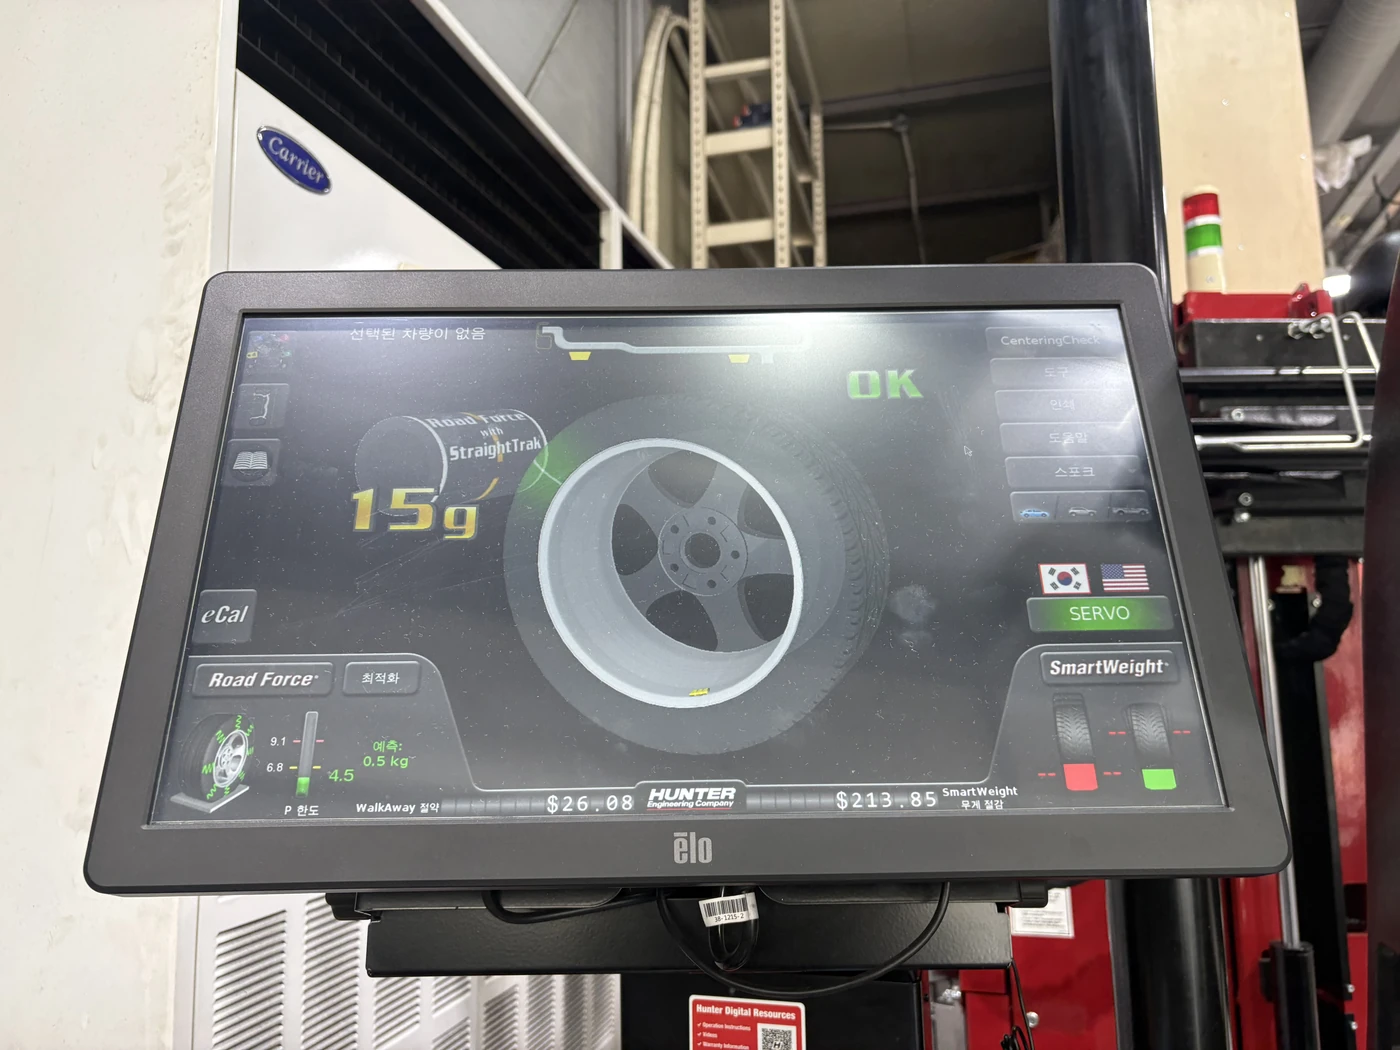
The Hunter RFW has a maximum load specification of 567 kg; that is not a recorded applied load for this vehicle. The Road Force balancing guide (Korean) explains loaded measurement and vibration that can remain after conventional balancing.
06
Road-test results and the technician’s assessment
After bushing tightening, ride-height calibration, alignment and Road Force balancing, we road-tested the vehicle again. We checked whether the earlier steering vibration and left drift remained, and compared the ride with that morning.
FOUR ROAD-TEST CHECKS
After adjustment,
what changed on the road?
Steering vibration & resonance
Recheck vibration at the speeds where it was noticed
Steering position
Check that the steering wheel sits centred when driving straight
Straight-line behaviour
Check whether the vehicle tends to drift to one side
Ride feel
Assess harshness and body movement over the road
ROAD VIBRATION · BEFORE AND AFTER
Comparing the recordings
with the driving assessment
- 01Initial road test
- 02Post-work recording
- 03Data and driving assessment
One vibration component in the same speed band
135–139 km/h
Values are the mean amplitude of detected instances of one vibration component. g is a unit of acceleration.
The post-work value comes from one detection. Driving conditions and recorded time in this band differed: 14.5 seconds before and 3.5 seconds after. It does not establish an overall vibration improvement percentage.
Some other bands recorded higher values
The same vibration component in two other speed bands:
| Speed bandkm/h | Beforeg | Afterg |
|---|---|---|
| 80–84 | 0.0498 | 0.0540Higher |
| 85–89 | 0.0429 | 0.0563Higher |
Vibration was also recorded at higher speeds after the work. We considered both the lower values and the vibration that remained, alongside the steering, drift and ride observations below.
Scope of the comparison
Driving conditions and the amount of data in each speed band differed between tests. This component was also recorded at 145–159 km/h after the work. With no corresponding pre-work values for that range, we cannot say whether it was newly present. The post-work recording followed the combined bushing-tightening, ride-height, alignment and Road Force work.
OBSERVATIONS FROM THE DAY’S ROAD TESTS
Rechecking the original
steering vibration
| Item | Before the work | Final road test |
|---|---|---|
| Steering vibration | Steering vibration occurred during the initial road test. | That vibration was not reproduced when the same speed range was checked again. |
| Steering position | The steering wheel sat to the left while travelling straight. | The steering wheel returned to centre. |
| Left drift | The vehicle had a gentle tendency to drift left. | The earlier left drift was not reproduced on the final road test. |
These observations are drawn from the before-and-after road-test records. Measured ride height and toe are shown in the earlier comparison diagrams.
JONG-TAE KIM · ASSESSMENT FROM DRIVING THE VEHICLE
The ride felt noticeably
more compliant than that morning
From driving the vehicle that morning and again after the work, I felt a clear improvement in how the suspension moved over the road. In my experience, the Sport feels firmer than the Vogue, but it no longer felt as unyielding as it had on arrival.
After rechecking the earlier steering vibration, steering position and drift, I judged the driving feel to have improved. That assessment followed the combined bushing-tightening, ride-height, alignment and Road Force work.
The remaining issues were also explained
The left-rear adjustment arm remained stiff and was not replaced during this visit. A cross-caster difference also remained, and both points were explained to the customer. The owner described the changes after driving the vehicle during a phone call the following day. Read the owner’s feedback below.
07
Plan suspension repairs
through to tightening and the road test
Some owners come to us after replacing suspension parts, tyres and shock absorbers. Among other customers we have seen, some had spent tens of millions of won on repairs and still had the same discomfort.
Accurate diagnosis comes first. Replacing more parts without identifying the cause can add to the bill. We need to compare the remaining symptoms with the previous work and decide what actually needs attention.
The tightening work required for the relevant parts is best completed during replacement. Reopening and readjusting the same areas later because the ride is still uncomfortable can mean repeated labour and another visit. Planning any necessary height and alignment work together helps reduce that duplication.
Our suspension work includes the relevant bushing positions and tightening requirements, with any necessary height and alignment work planned alongside them. After adjustment, we drive the vehicle to check the original concern again. As with this Range Rover, we allow time to complete that process before handover.
08 · Scope and cost
The cost depends on the vehicle
and the work it needs
Ride-height bushing tightening is not the same job on every vehicle. The price changes depending on whether work is needed at the front, the rear, or both.
- Vehicle model — Suspension design and access to the fasteners vary.
- Front and rear scope — We establish which areas need attention.
- Related work — We check whether ride-height calibration and wheel alignment are also needed.
Diagnosis comes first, followed by the scope of work and a quotation. Work proceeds within the scope you approve.
09
Questions about bushing tightening and ride height
How much does ride-height bushing tightening cost?
It depends on the vehicle and the scope of work. We first establish whether the front, rear or both need attention. Related work such as ride-height calibration and wheel alignment also affects the price. After diagnosis, we explain the scope and quotation and proceed with your approval.
What is ride-height bushing tightening?
It means securing the relevant rubber-bushed joints with the suspension at its normal standing position. Tightening with the wheels hanging can leave the rubber twisted and unnecessarily loaded when the vehicle is lowered. The process matters for both ride comfort and bushing life, with the applicable joints and tightening requirements determined by the vehicle and component.
Should a firm ride always be treated with bushing tightening?
Start with a road test and suspension inspection. Tyres, pressures, bushing and arm condition, and ride height can all matter. A seized or damaged component cannot be repaired simply by changing its tightening position.
Is this the same as air-suspension height calibration?
No. Bushing tightening concerns the position at which a joint is secured. Height calibration sets the air-suspension height reference using physical measurements. This vehicle still had left–right height differences after bushing tightening, so height calibration followed.
Why check alignment again after adjusting ride height?
Alignment readings can change with suspension height. On this vehicle, toe was adjusted after bushing tightening and height calibration, followed by a road test. The initial alignment measurement was only the starting point.
Did bushing tightening alone remove the steering-wheel vibration?
The work also included Road Force balancing, ride-height calibration and wheel alignment. The original vibration was not reproduced during the final road test, but the result cannot be assigned to bushing tightening alone.
Was the stiff rear arm replaced?
Stiffness was found at the left-rear adjustment arm, but it was not replaced during this visit. Its condition and the remaining cross-caster difference were explained to the customer, with changes in driving behaviour to be monitored.
How long does ride-height bushing tightening take?
It depends on the vehicle and the accompanying work. In our experience, Range Rovers tend to take longer. This vehicle took a full day for bushing tightening, height calibration, alignment, Road Force work and repeated road tests together. That was not the duration of bushing tightening alone; the time needed is discussed when booking.
Should this be planned when suspension parts are replaced?
The tightening work required for the relevant components is best completed during replacement. Planning any necessary height and alignment work at the same time can reduce repeated labour from reopening and readjusting the same areas later. Our suspension work includes checking the tightening position and specifications, followed by a road test.
What information should I send when enquiring?
Send the model, year, mileage and the conditions in which you notice the problem. Harshness over bumps, vibration at a particular speed, or a change after parts replacement lead to different checks. Recent suspension and tyre-service records also help.
OWNER FEEDBACK AFTER COLLECTION · 10 SEP 2026
“It’s so much better.”
During a phone call the next day, the owner described how the vehicle felt after driving it. They said the thumping from the rear over speed bumps was gone and expressed their satisfaction with the changed ride.
“The thumping from the rear over speed bumps is gone”
“I’m really pleased. Thank you.”
Translated excerpts from the Range Rover Sport owner’s phone call on 10 September 2026.
The technician’s road-test assessment and vibration recordings from the day of the work are also available above.
NHC MOTORS · SUWON · BY APPOINTMENT
Still unhappy with the ride
after suspension repairs?
Before considering more replacement parts, we’ll inspect the parts already fitted, their tightening condition and the tyres.
After inspection, we explain the required work and estimate, then proceed with your agreement.
Start with the model and what feels wrong. If you have recent repair details, please share them too.
524 Maesonggosaek-ro, Gwonseon-gu, Suwon, Gyeonggi-do