Home › Repair cases › BMW 1 Series differential
Differential repair
BMW F20 Differential Noise After an Oil-Leak Repair
The owner had recently bought this BMW 1 Series F20 used. They told us the differential had been repaired under warranty for an oil leak, but a loud noise started after that repair. With the problem still unresolved after a follow-up enquiry, they brought the car from Gunsan to our workshop in Suwon.
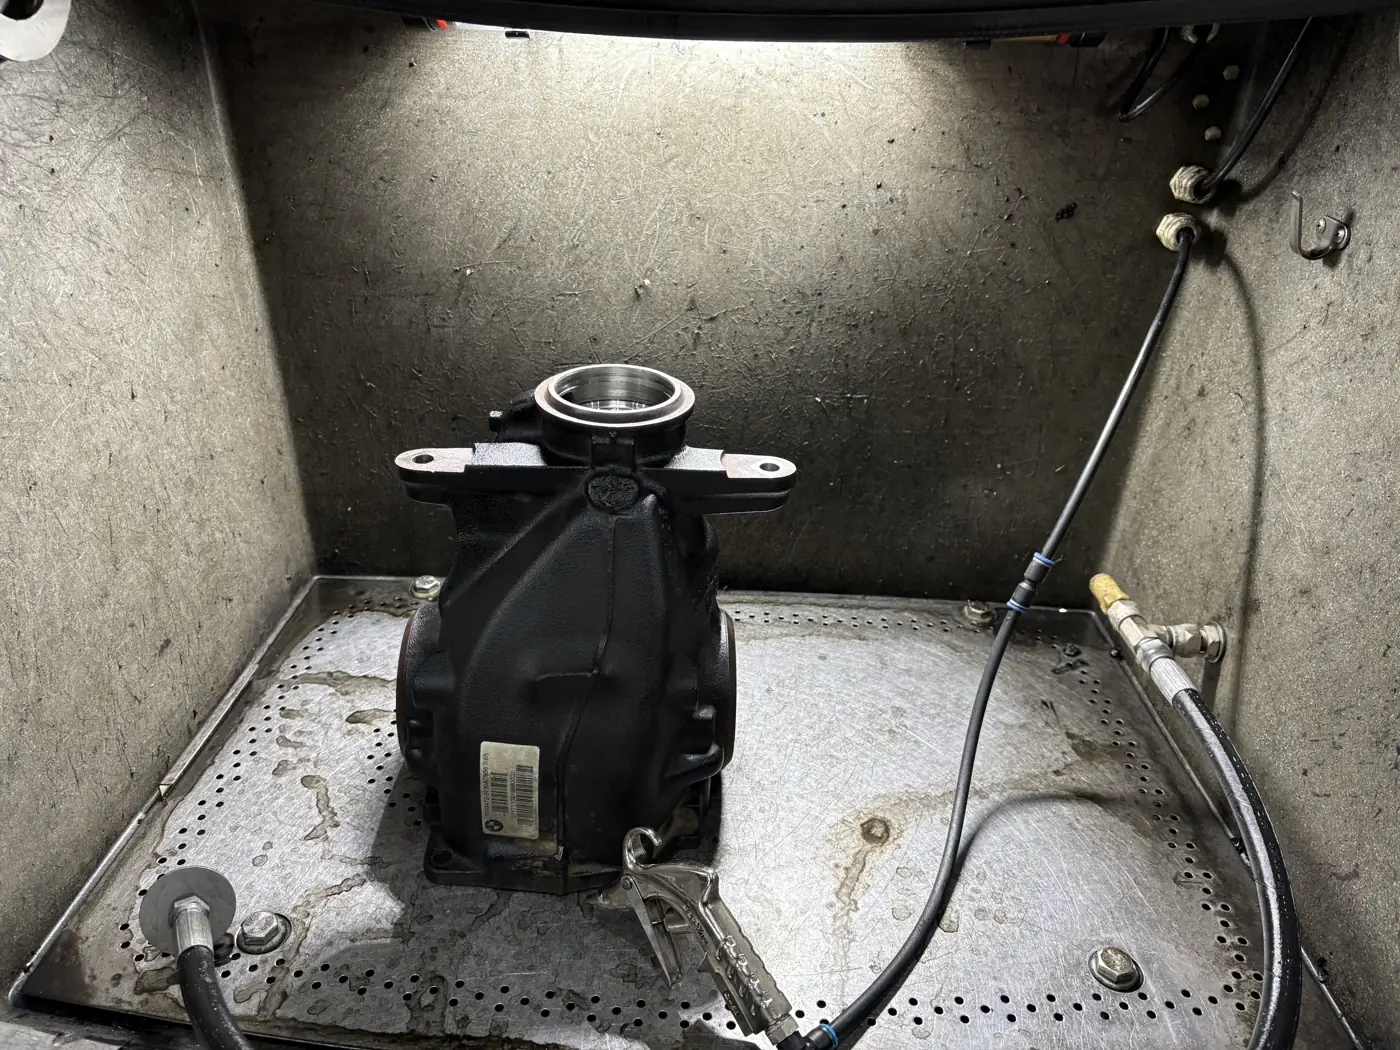
When we opened the differential, we found substantial play and damaged bearings. We replaced the damaged bearings and reassembled the unit. On the road test, the noise that had brought the owner to us was gone.
Contents
Symptoms and previous repair
The noise grew louder when the accelerator was released. The owner said it had also worsened on the journey to the workshop.
Since the noise had started after the oil-leak repair, the previously worked-on area was the starting point.
Noise diagnosis before repair
With the vehicle running on the lift, electronic listening equipment was used to compare the sound. The axle and pinion areas were checked in turn. A loud noise was identified at the pinion area.
The accelerator was pressed and released to check how the sound changed. As on the road, the noise became louder when the pedal was released. This condition was recorded before removing the differential.
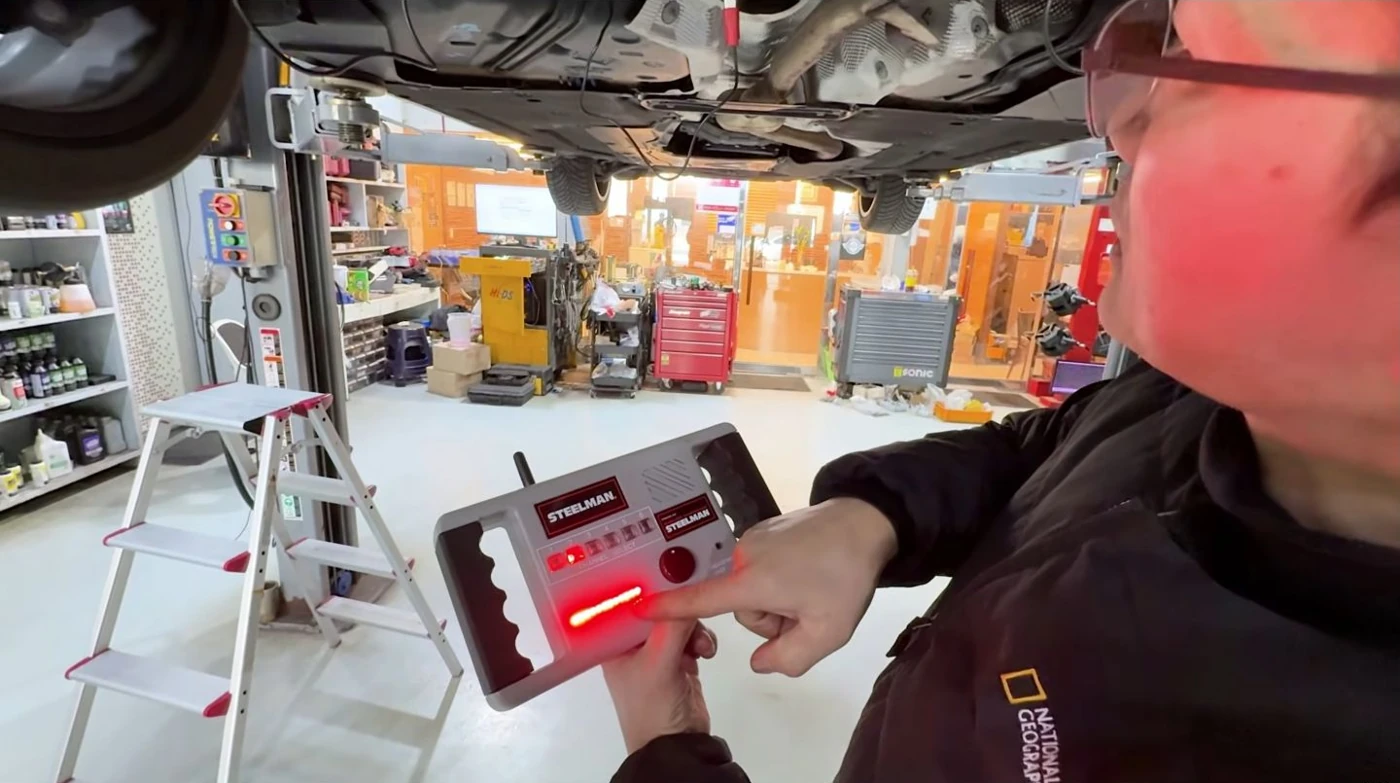
“When driving, the noise was louder when releasing the accelerator.”
Kim Jong-tae · translated from Korean · Work video 0:41–0:42
COMPONENTS / 3D CONCEPT
Differential and bearing concepts
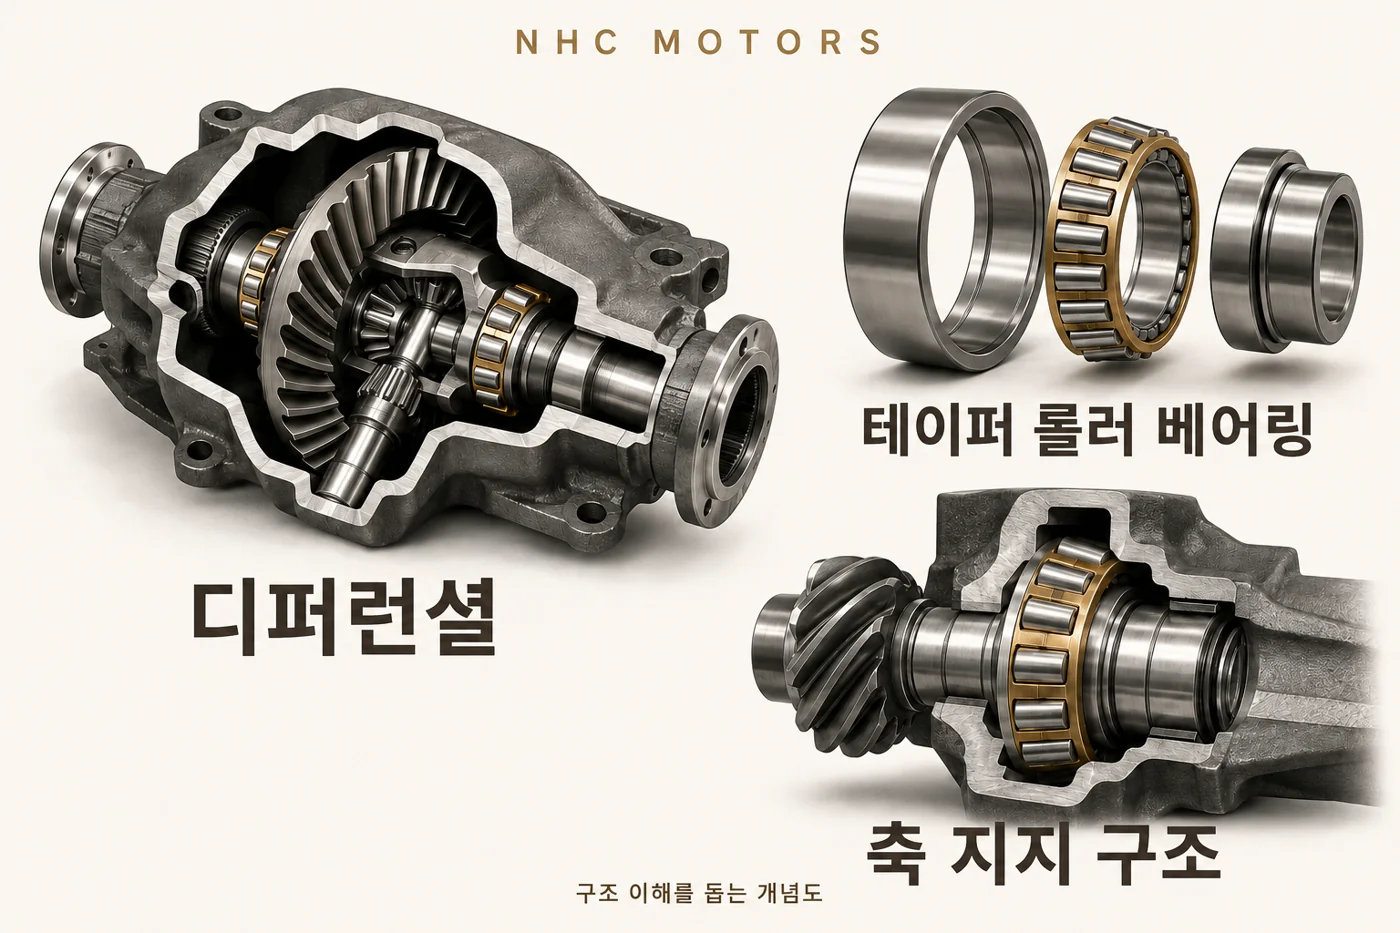
DifferentialTransfers drive to the rear wheels.
Tapered roller bearingSupports rotating parts inside the assembly.
Shaft supportA concept view of how a bearing supports a shaft.
Disassembly findings and assessment
Play found during disassembly
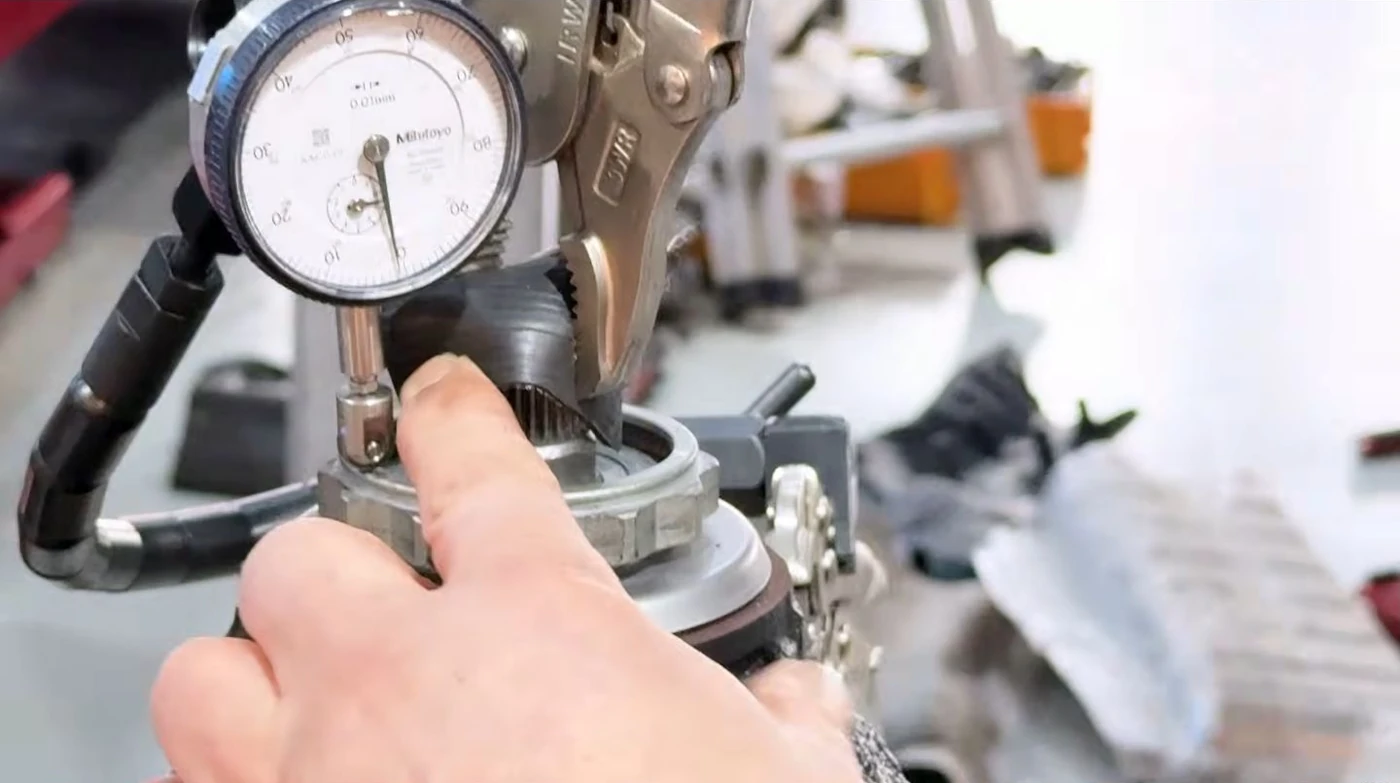
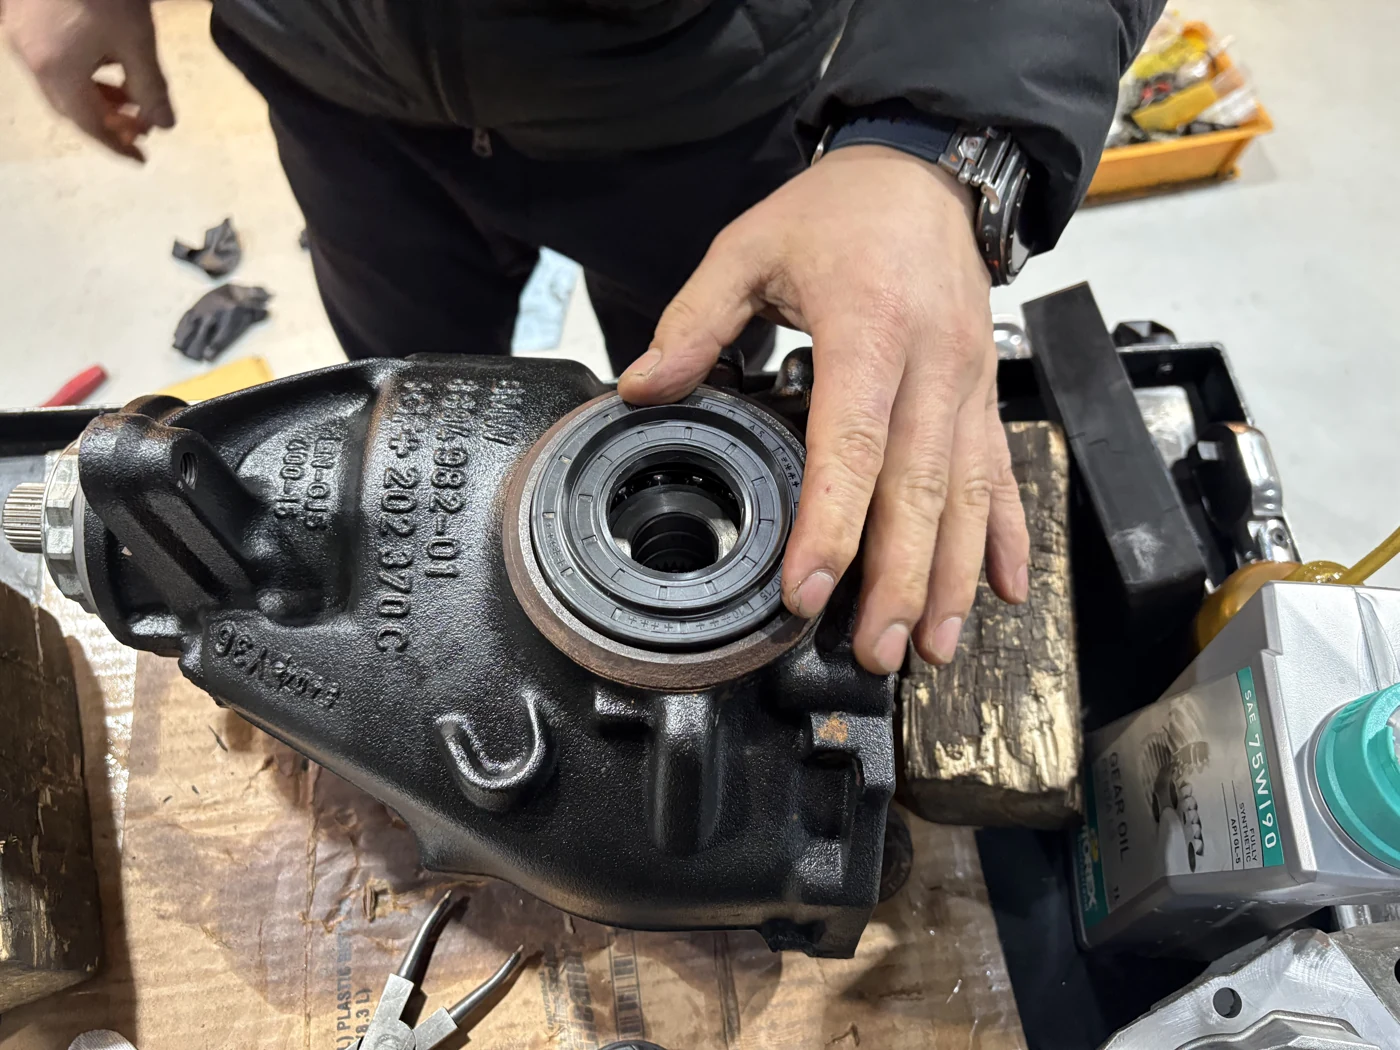
The parts moved substantially during disassembly. Some bearing contact surfaces looked cloudy, with markings concentrated along a narrow line.
“It is moving around a lot right now.”
Jong-tae Kim · translated from Korean · Video 3:35
Bearing contact surfaces and repair assessment
The noise had started immediately after the oil-leak repair. Disassembly then revealed substantial play and damaged bearing contact surfaces. Together, these findings pointed to a possible assembly problem during the earlier repair. With the bearings already damaged, an oil change alone would not address the problem.
The material available for this case does not include preload or backlash measurements from the earlier repair. Without those records, it is not possible to establish which setting was out of specification, or by how much. The repair therefore focused on replacing the damaged bearings and reassembling the differential.
Related information is available in the guide to differential failures in imported vehicles.
BMW F20 / DIFFERENTIAL INSPECTION
Inside the differential: the repair evidence
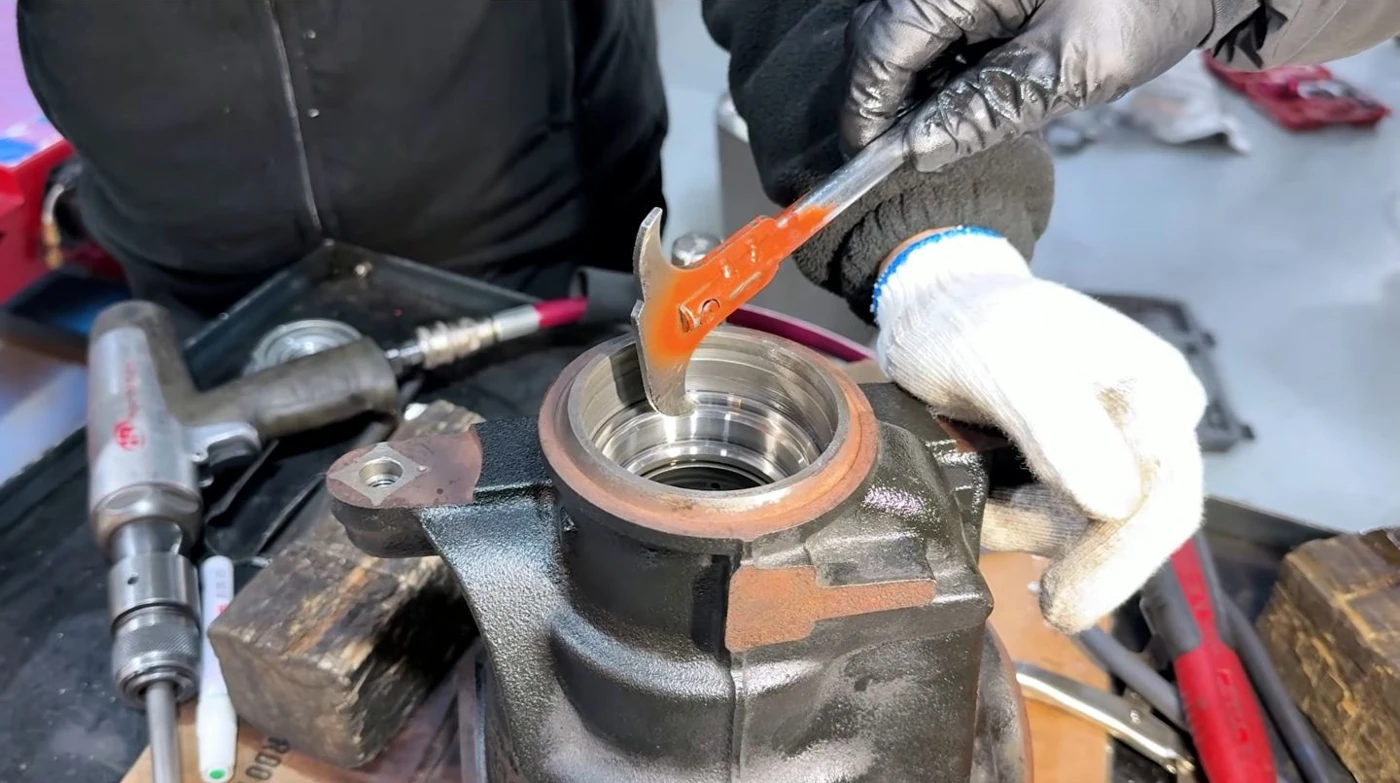
- FINDINGPlay and surface damage
The assembly moved with substantial play. Marks and discolouration were visible on the bearing contact surface.
- REPAIRDamaged bearings replaced
The housing and internal components were cleaned before the differential was reassembled.
- RESULTOriginal noise did not recur
Checked with listening equipment and a road test immediately after the work.
Bearing replacement and reassembly
The complete differential was not replaced. It was dismantled and the damaged bearings were replaced.
Replacement parts
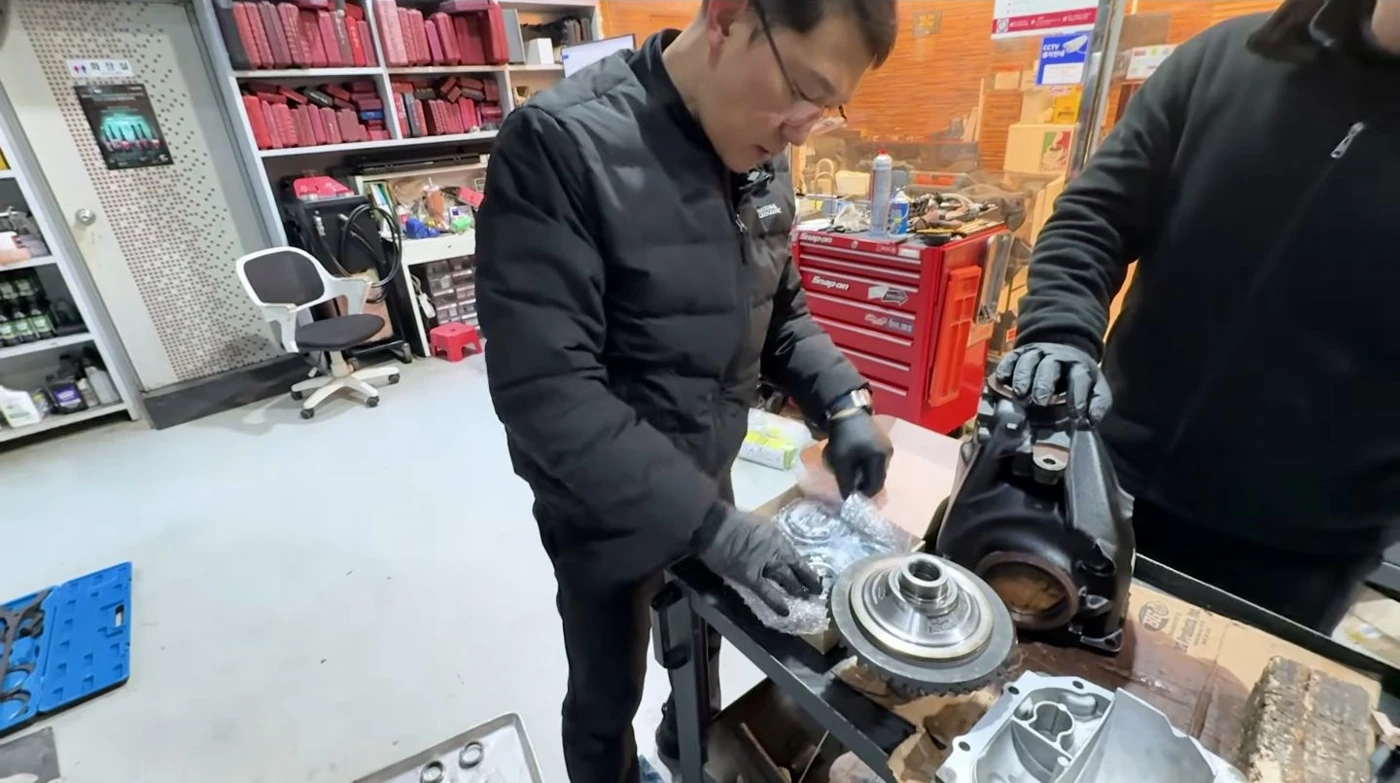
The replacement parts were prepared and their mating surfaces inspected.
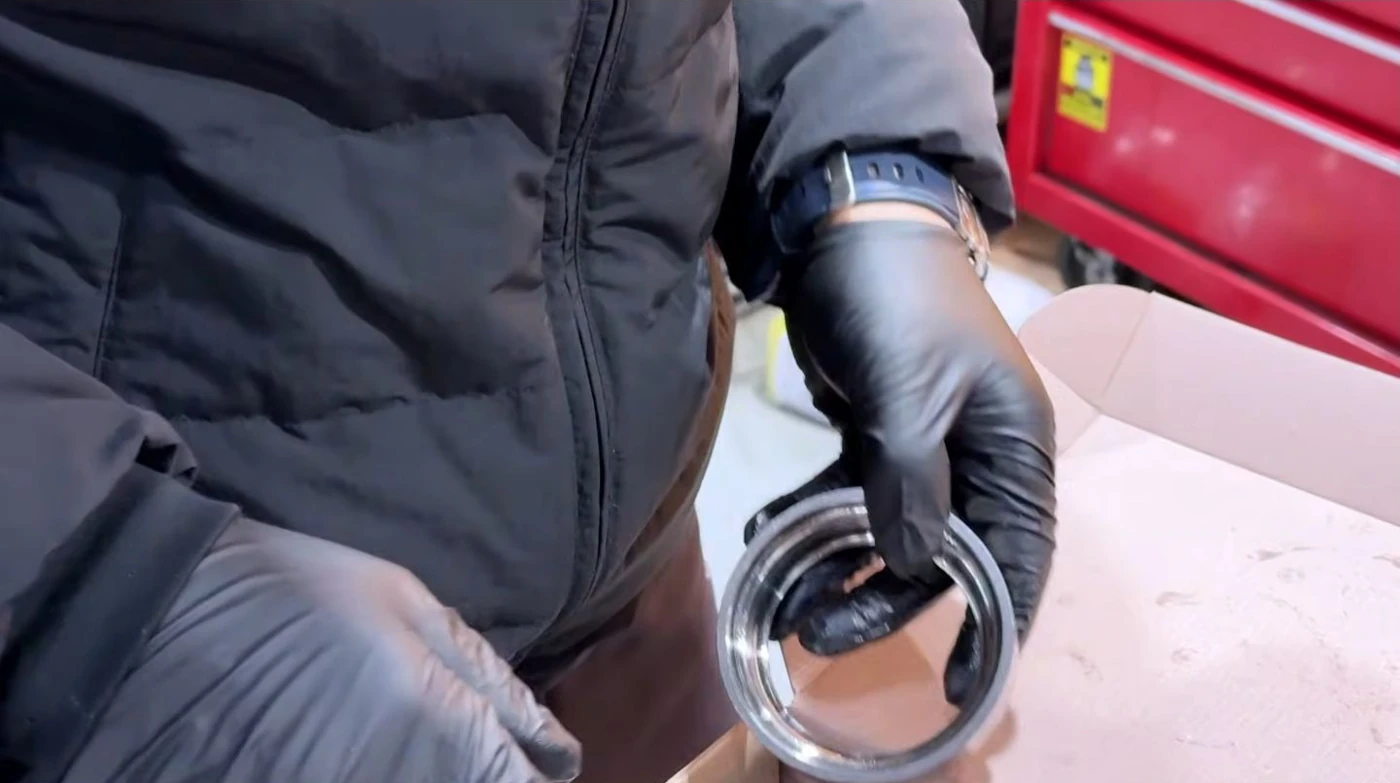
Cleaning and reassembly
The housing and internal components were cleaned before reassembly.
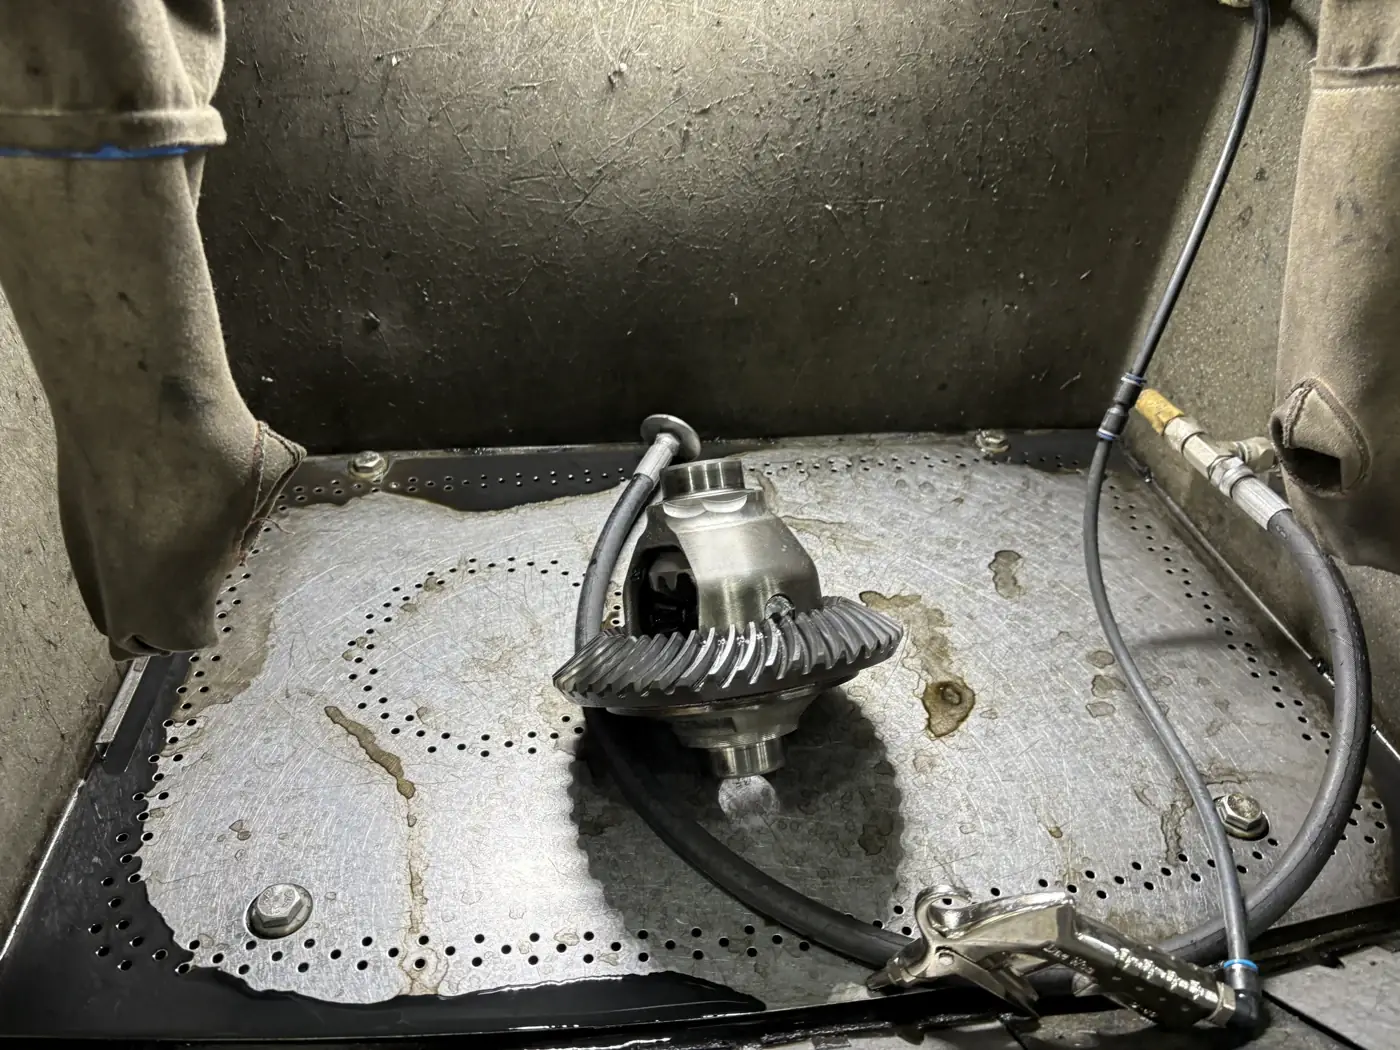
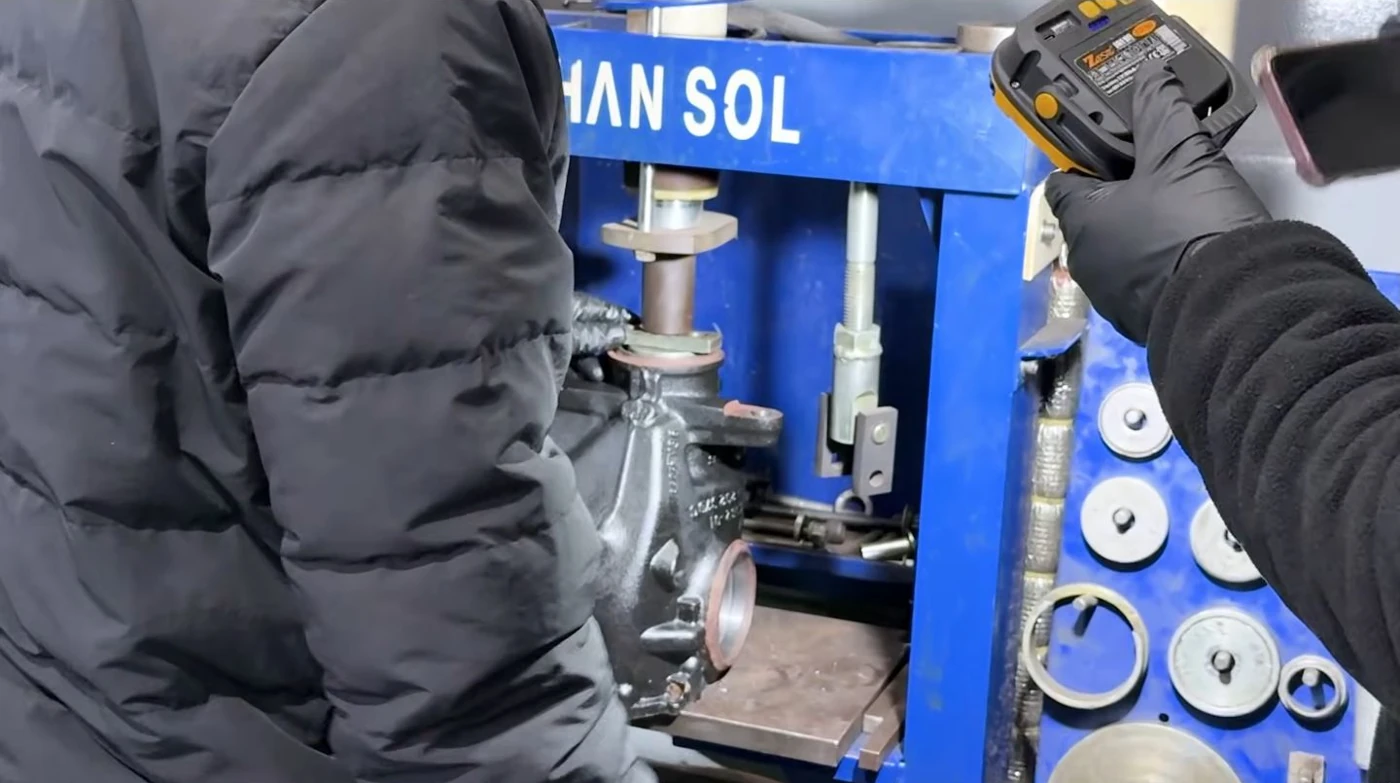
After the assembly measurements, the differential went back into the car. The next step was to accelerate and release the pedal, reproducing the conditions that had made the noise louder.
Wheel alignment
HUNTER HAWKEYE 3D / BEFORE & AFTER
Unequal toe → Matching sides
BEFORE
Different left/right readings
AFTER
Matching left/right readings
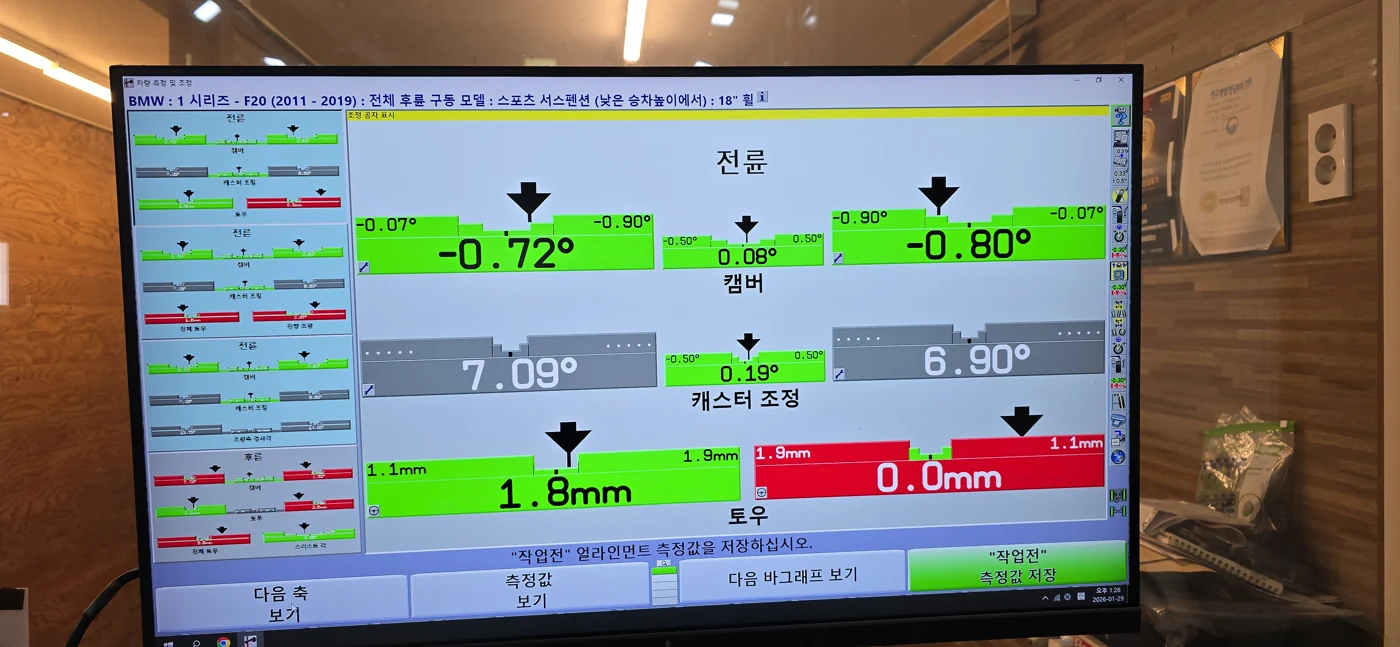
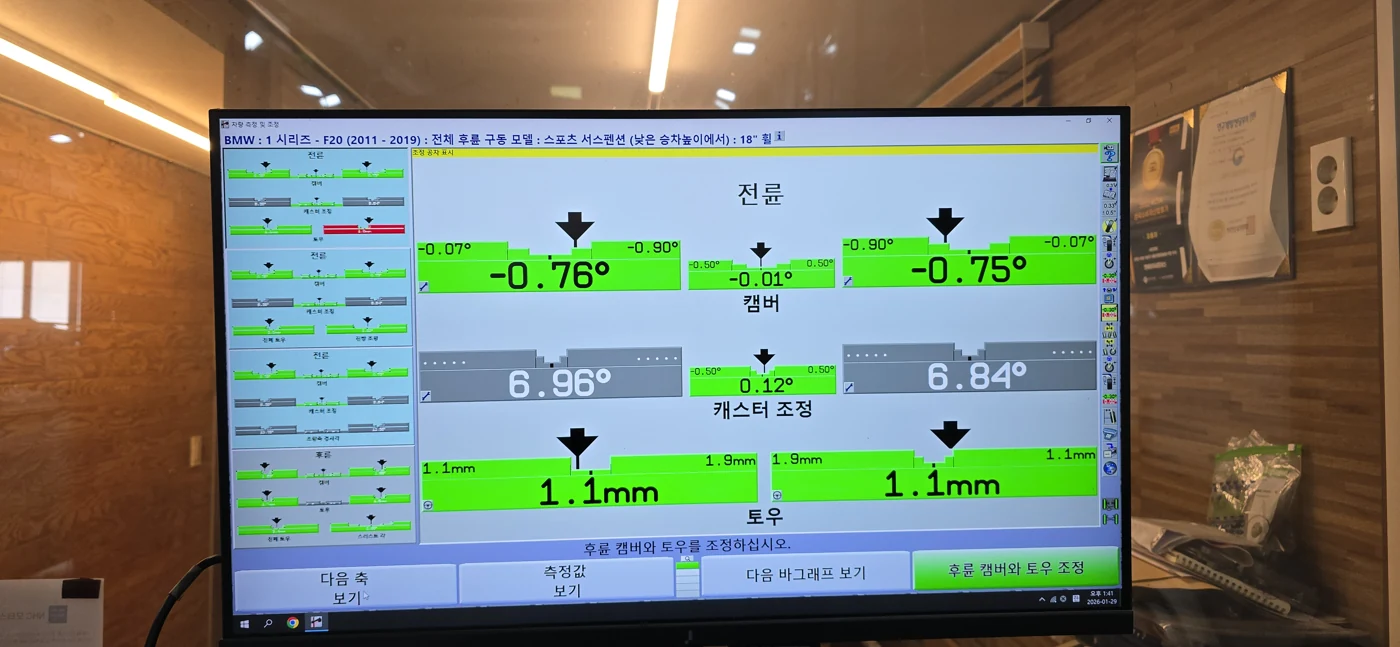
This car had lowering springs and wheel spacers fitted. The front tires were rubbing against the fenders. At the customer's request, the front spacers were removed and moved to the rear. Wheel alignment was then adjusted to account for the reduced ride height.
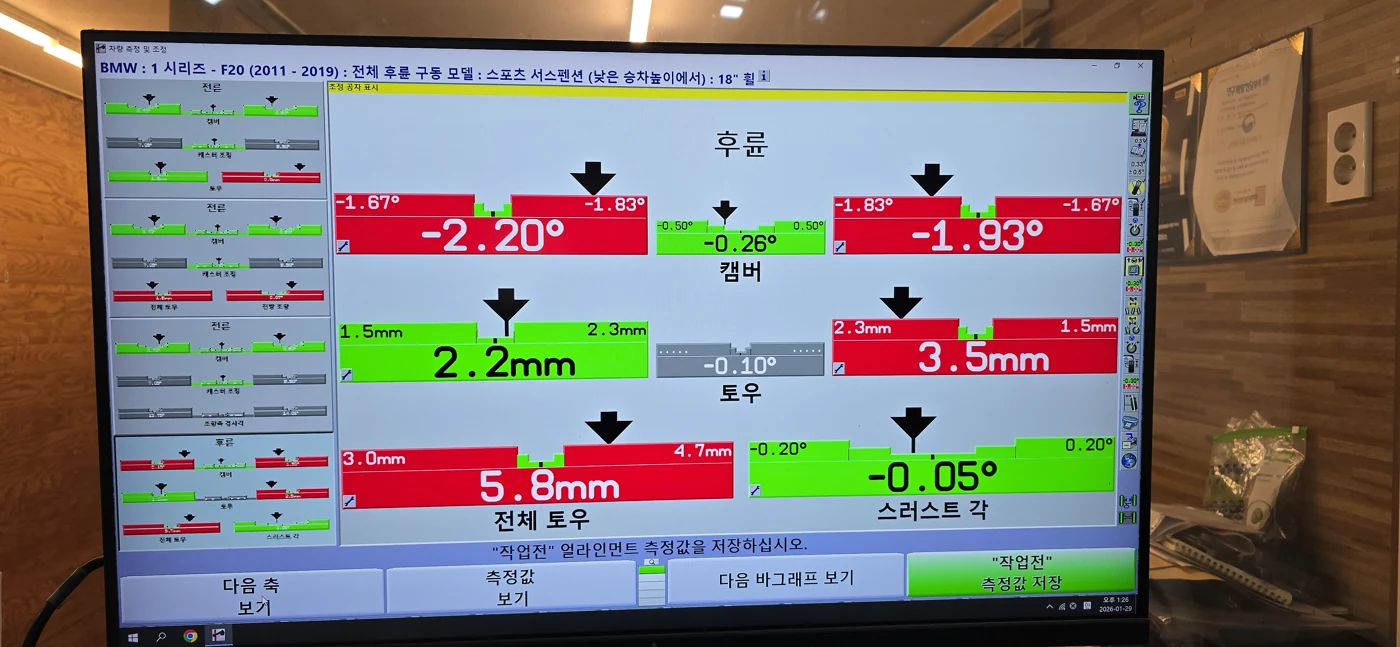
At the rear, camber and right toe were outside the ranges displayed on the equipment.
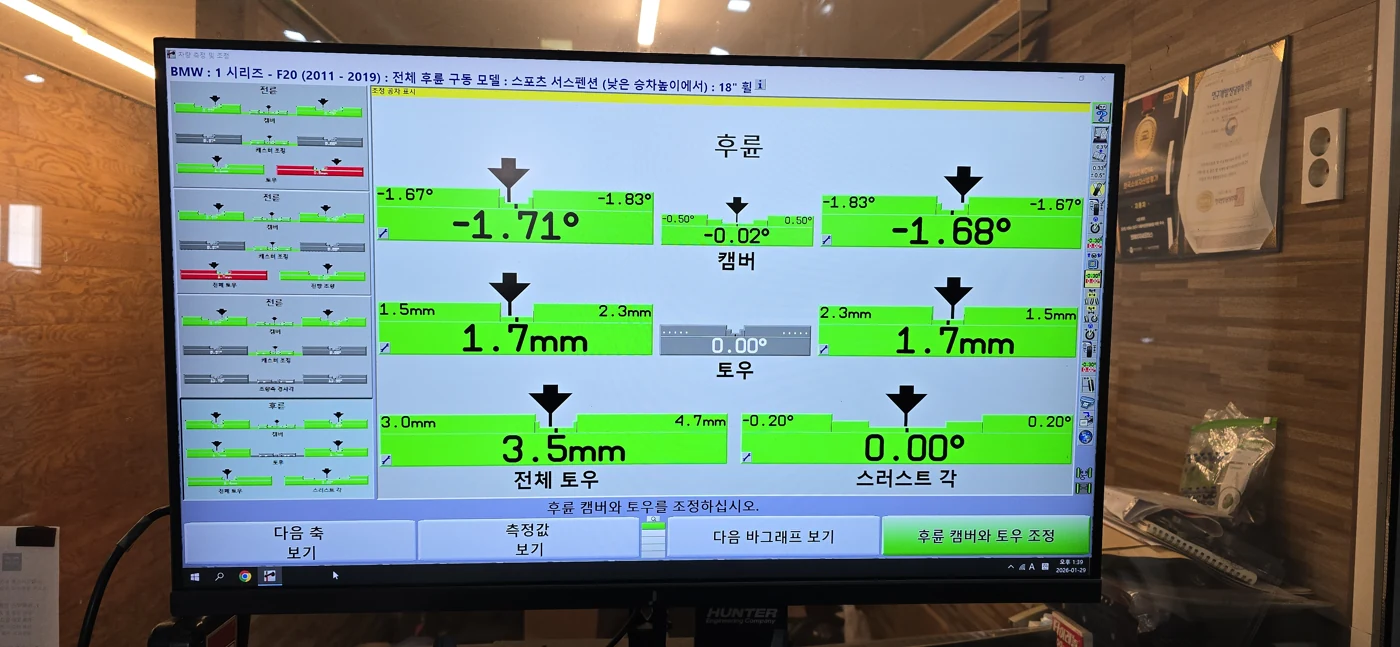
The values below record this vehicle's wheel alignment before and after adjustment. They do not measure differential noise levels.
| Measurement | Before | After |
|---|---|---|
| Front toe Left / right | 1.8 / 0.0mm | 1.1 / 1.1mm |
| Rear camber Left / right | −2.20° / −1.93° | −1.71° / −1.68° |
| Rear toe Left / right | 2.2 / 3.5mm | 1.7 / 1.7mm |
| Rear total toe | 5.8mm | 3.5mm |
| Thrust angle | −0.05° | 0.00° |
Individual readings and totals are reproduced exactly as displayed. These settings are not a reference specification for vehicles with different ride heights or wheel fitments.
Rear alignment screens
Front alignment screens
Checks after repair
With the differential back in the car, the listening equipment was applied again. Releasing the accelerator no longer produced the loud noise heard on arrival.
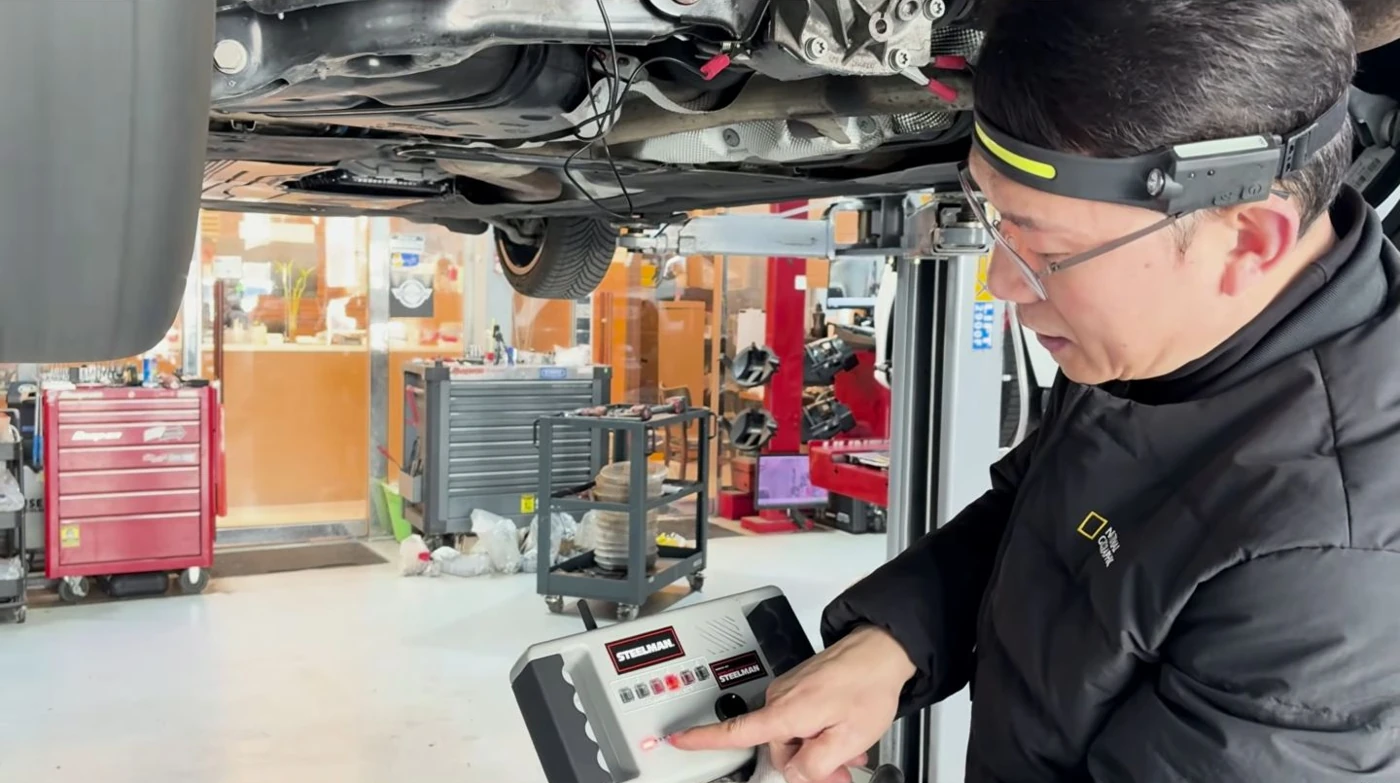
The same acceleration and deceleration sequence was repeated on the road. The original noise did not return. A further test drive followed with the owner.
| Check | Before repair | After repair |
|---|---|---|
| Running on the lift | Loud noise at the pinion area | Change in the listening equipment's signal confirmed |
| Accelerator release | Noise became louder | Original noise did not recur |
| Road test | Loud noise during deceleration | Original noise did not recur |
The noise was gone after bearing replacement and reassembly. Wheel fitment and alignment were separate jobs. These results describe the equipment checks and road tests immediately after the repair.
Used-car warranty repairs: what to check before buying
The owner said this F20 had received a warranty repair for an oil leak after purchase. The loud noise began immediately after that repair. NHC found play and bearing damage during disassembly. The previous workshop’s records and insurance approval documents were not reviewed.
Warranty insurance aims to reduce losses when a used car differs from its description. But advice to buy the car and claim for an existing fault later is not enough. Compare the performance and condition inspection record, the actual fault and the policy requirements. An approved repair still needs to follow the vehicle’s workshop manual and specifications.
Before buying, Total Inspection can establish the car’s condition and estimated repair costs (Korean guide). Poor condition may be a reason to walk away. If you proceed, check insurance coverage and record the dealer’s repair promises in the contract. Substantial repair estimates can also inform a request to adjust the vehicle price.
Customers buy a car to keep driving it, not just for one month. Clarify who pays if a claim is declined and how problems after repair will be handled. Our Total Inspection guide covers warranty periods, contract terms, price negotiations and records to retain (Korean).
Repair video
The video shows the noise before repair, the disassembly findings, and the checks after reassembly.
- 0:00 Noise diagnosis before repair
- 1:04 Background and previous repair
- 3:25 Play and disassembly findings
- 4:58 Replacement parts and reassembly
- 6:45 Noise check after repair
- 10:30 Road test results and additional work
The photographs and measurements document work on this BMW F20. Alignment values are reproduced from the Hunter HawkEye 3D display.
NHC Motors has serviced imported and Korean vehicles in Suwon for nearly 30 years. Representative Kim Jong-tae’s automotive repair career began in 1991.
NHC holds two Korean registered patents for wheel alignment and maintenance scheduling (Nos. 10-2646528 and 10-2552759). Two USPTO applications and two PCT international applications are pending. Patents, applications and supporting documents (Korean)
NHC holds Korean venture business certification in the innovative growth category and is registered in SAM.gov, the US federal procurement system. Equipment includes Hunter HawkEye 3D wheel alignment.
Frequently asked questions
What should be checked if noise appears after a differential oil-leak repair?
Start with the area recently repaired and the conditions that make the noise louder. On this car, releasing the accelerator increased the noise, and listening equipment picked up a louder sound near the pinion. The differential was then dismantled for inspection.
Does louder noise when releasing the accelerator mean the differential has failed?
That symptom alone does not establish a differential fault. The source of the sound needs to be narrowed down first. On this car, the axle and pinion areas were compared before proceeding.
Would another oil change have solved it?
Changing the oil cannot restore an already damaged bearing. The bearings on this car needed replacement, followed by reassembly.
Was the complete differential replaced?
No. The existing differential was dismantled and its damaged bearings replaced. The extent of internal damage and parts availability can make a complete replacement necessary on other vehicles.
Did wheel alignment fix the differential noise?
No. The noise disappeared after bearing replacement and reassembly. Alignment was adjusted separately to suit the lowered ride height and wheel fitment.
Am I responsible for every post-repair problem once the warranty expires?
Expiration alone does not determine every issue in the same way. Alongside the warranty's coverage, it is necessary to establish what work was done and what happened afterward. Keep the repair statement and symptom records, and ask the workshop and insurance contact how the issue will be handled.
What information should I provide when contacting NHC?
Provide the model, year, mileage and the conditions in which the noise occurs. It helps to know whether it happens under acceleration or when releasing the pedal. If it started after a repair, include the work record and repair date. Costs are quoted after inspecting the car and identifying the required parts.
Differential noise inspection and repair enquiries
Tell us how the noise changes under acceleration and when you release the pedal, and what work was done recently.
Call 031-258-1617Book on Naver524 Maesonggosaek-ro, Gwonseon-gu, Suwon, Gyeonggi-do · By appointment only